Vibratory Finishing for CNC Parts: Process, Media, and Deburring Methods
22 min
- What Is Vibratory Finishing?
- Vibratory Finishing Process for CNC Machined Parts
- Process Variables in Vibratory Finishing
- Vibratory Finishing Media: Types and Selection
- Vibratory Deburring for CNC Components
- Vibratory Polishing and Surface Finish Quality
- Common Vibratory Finishing Applications
- Advantages and Limitations of Vibratory Finishing
- Part Design and Suitability for Vibratory Finishing
- FAQ About Vibratory Finishing
Key Takeaways
- Vibratory finishing is a batch surface treatment process that uses vibrating abrasive media to deburr, smooth, and polish CNC machined parts simultaneously.
- The vibratory finishing process works on large batches without operator attention during the cycle.
- Media selection is the primary variable controlling whether you get aggressive deburring, surface smoothing, or high-shine vibratory polishing.
- Vibratory deburring removes burrs and sharp edges consistently across complex geometries that manual deburring misses.
- The process has real limitations on thin-walled parts, large components, and features with very tight tolerances.
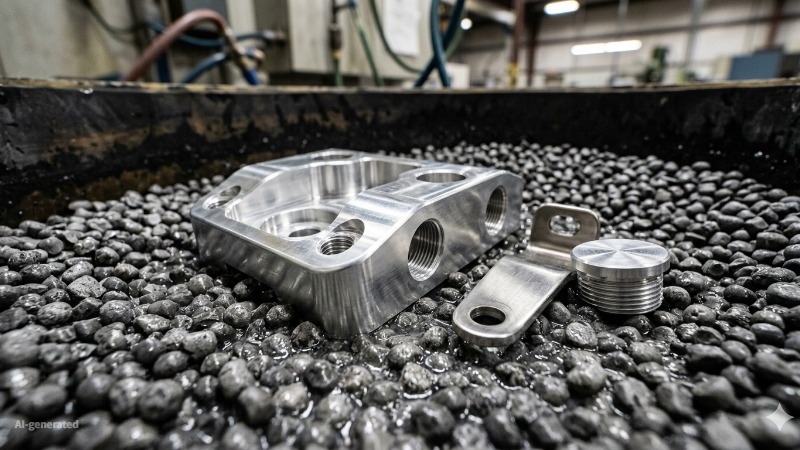
(AI generated) CNC machined metal parts inside a vibratory polishing machine
CNC machining can produce highly precise parts, but it does not always deliver the final surface condition required for assembly, coating, or end use.
The cutter leaves some combination of burrs, sharp edges, tool marks, and surface roughness on the part that needs addressing before it goes into an assembly or gets coated.
Vibratory finishing is a mass finishing method used to deburr, smooth, clean, and polish CNC machined parts in batches using abrasive media, vibration, and finishing compounds.
This work can be done manually by a deburring technician using files and abrasive pads, or it can be automated in a vibratory finishing machine that processes an entire batch with minimal operator intervention.
This guide covers how it actually works, what variables control the output, and where it fits in a real CNC manufacturing environment.
What Is Vibratory Finishing?
(AI generated) CNC machined parts in the vibratory tumbling process
Definition of Vibratory Finishing
Vibratory finishing is often less visible than CNC machining itself, but it plays a critical role in preparing parts for assembly, coating, and final use. But in any shop running production volumes of CNC parts, the vibratory finishing process quietly handles work that would otherwise consume significant labor hours per week.
How Vibratory Finishing Works
The equipment is mechanically simple, but the finishing results depend on several interacting process variables. A tub or bowl sits on springs and gets driven by an eccentric weight motor. When the motor runs, the tub, media, parts, and compound solution all move in a controlled vibratory pattern. Parts and media move relative to each other continuously, and every point where media contacts a part surface does a small amount of abrasive work. Multiply that by millions of contacts per hour across an entire batch and you get consistent material removal across every part in the load.
The motion pattern matters. Most vibratory finishing machines produce a helical or toroidal flow, media and parts circulate slowly around the tub while vibrating. This circulation ensures every part gets exposure across different orientations rather than sitting in one position getting worked on one face only. The circulation rate is controlled by the vibration frequency and amplitude, and it affects how aggressively the process works and how uniformly parts get finished.
Compound solution, water mixed with a chemical compound specific to the material and finishing stage, floods the tub during operation. It lubricates the media, suspends swarf and abraded material, controls the cutting action of the media, and keeps parts and media clean throughout the cycle. Drain and fresh compound rinse happens either continuously or at intervals depending on the process.
Why Vibratory Finishing Is Used for CNC Parts
Because doing it manually doesn't scale. A machinist deburring parts by hand does good work on the parts they can reach with a file or abrasive pad. They miss internal edges, undercuts, cross-drilled hole intersections, and anywhere their tool can't physically access. They also introduce variation, the first part in the morning gets more attention than the fiftieth part before lunch. Vibratory deburring can reach any surface the media can access, deliver more consistent results across the batch, and reduce direct labor during the finishing cycle.
Need precision CNC parts before secondary finishing?
JLCCNC specializes in custom CNC machining for rapid prototypes and production parts. Although vibratory finishing is typically performed as a secondary process, JLCCNC helps customers optimize machined part geometry, burr condition, and surface preparation to support downstream deburring, polishing, anodizing, and assembly workflows.

Precision CNC Machining Service
Professional manufacturing, fast turnaround, and quality assurance.
Vibratory Finishing Process for CNC Machined Parts
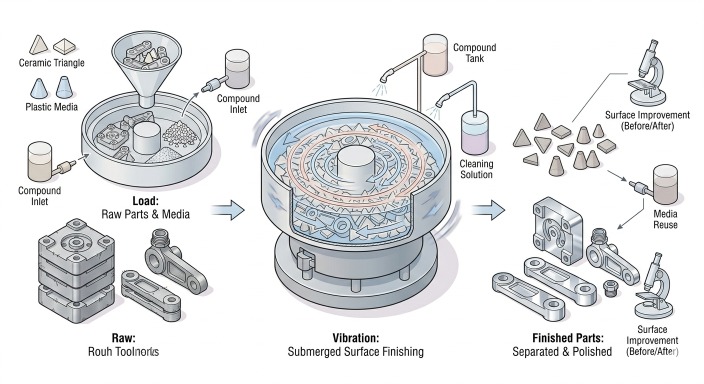
(AI generated) Diagram of Vibratory Finishing Process
Loading Parts and Media
The ratio of parts to media in the tub is one of the most important variables in the vibratory finishing process. If the load contains too many parts relative to the amount of media, the parts may contact each other instead of the media, leading to part-on-part damage, inconsistent finishing, and possible scrap. Too little media and the process slows significantly. Standard loading ratios run 20-40% parts by volume with media filling the remaining 60-80%. For delicate parts or close-tolerance features, higher media ratios protect parts from contact with each other.
Part orientation at loading matters less than people expect, the circulation in the tub randomizes orientation within the first few minutes. What does matter is that parts aren't nested or stacked in a way that prevents media from reaching contact surfaces. Long flat parts stacked face-to-face won't get media contact on the mating faces. Parts that nest inside each other trap media. Separating fixtures or careful loading prevents these issues.
Vibration and Surface Finishing Action
Once the machine runs and compound is flowing, the abrasive action begins immediately.Media particles contact the part surface at relatively low force and low velocity compared with blasting or grinding, but they do so continuously and across all accessible surfaces throughout the cycle.The cutting action is gentle per contact but cumulative over millions of contacts across a cycle.
The abrasive in the media does the material removal. Media hardness, grit size, and composition determine whether the vibratory finishing process is cutting aggressively to remove significant burrs or working more gently to smooth and polish a surface that's already close to specification. Two identical machines can produce very different results if the media choice changes. The machine provides motion, while the media and compound determine the cutting or polishing action.
Cleaning and Final Surface Treatment
At cycle end, parts are separated from media, most vibratory finishing machines have a separator screen or discharge system that retains media while parts pass through. Parts come out wet with compound solution and need rinsing with clean water. Hot water rinse is standard for steel and aluminum parts going to anodize or plating, where compound residue on the surface would affect coating adhesion.
For vibratory polishing operations targeting bright surface finish, a dry finishing stage often follows the wet process. Parts go back into the tub with dry media, typically corn cob, walnut shell, or dry plastic media, that absorbs residual moisture and burnishes the surface to a brighter finish.
Process Variables in Vibratory Finishing
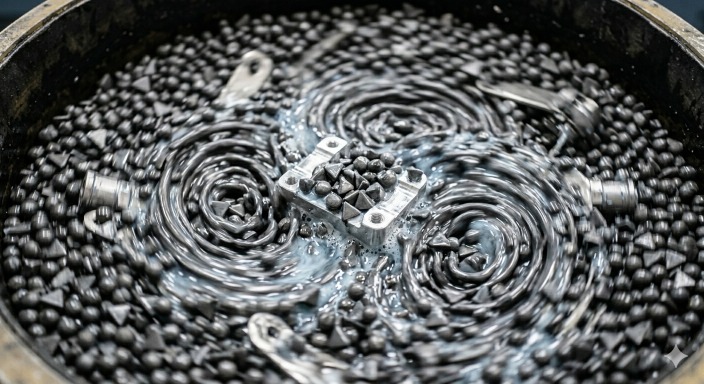
(AI generated) vibratory finishing machine showing abrasive media movement
Vibration Frequency and Amplitude
Most vibratory finishing machines operate between 900-1800 RPM. In general, higher machine intensity can increase media activity and shorten cycle time, but the actual cutting action depends on the combined effect of machine settings, media characteristics, part geometry, and load density. Lower frequency creates gentler action with more controlled material removal, better for delicate parts or fine surface finishing stages where you're smoothing rather than cutting.
Amplitude, how far the tub moves per vibration cycle, is set by adjusting the eccentric weight angle on the drive motor. High amplitude combined with high frequency creates the most aggressive vibratory deburring action. Low amplitude with low frequency produces the gentlest finishing conditions. Most production vibratory finishing setups run fixed parameters for a given part family rather than varying them within a batch.
Cycle Time Control
Cycle time directly controls how much material the vibratory finishing process removes and what the final surface condition looks like. Short cycles at 20-30 minutes handle light deburring on already-smooth CNC machined surfaces. Standard production deburring cycles run 1-3 hours. Surface refinement and pre-coating preparation cycles run 2-4 hours. Vibratory polishing to bright finish can run 4-8 hours in multiple stages with different media.
The mistake is running cycles based on habit rather than measurement. Checking surface finish and edge condition at intervals on the first run for a new part establishes the correct cycle time for that part and media combination. Running longer than necessary removes more material than intended and can round critical edges or change part dimensions on tight-tolerance features.
Compound and Lubrication Chemistry
The compound solution does more work in vibratory tumbling than most people give it credit for. It's not just lubrication, it controls the cutting action of the media, prevents corrosion during the wet process, keeps media clean and cutting effectively, and can brighten or protect the surface depending on chemistry.
Burnishing compounds contain no abrasive and are used with steel media for vibratory polishing operations, the chemistry brightens the surface while the steel media burnishes it. Cutting compounds add mild abrasive chemistry that accelerates material removal from the media. Rust inhibitor compounds are used on steel parts to prevent flash rust during the wet finishing cycle and immediately after. The correct compound for the material and finishing stage is as important as the correct media, using the wrong compound produces inconsistent results regardless of how well everything else is specified.
Part-to-Media Ratio
Part loading density changes the dynamics of the vibratory finishing process significantly. In a densely loaded tub, parts receive more media contacts per unit time but also have higher risk of part-on-part contact. In a lightly loaded tub, parts move more freely and get better media access on complex geometry, but cycle time increases because each part receives fewer contacts.
For precision CNC components with tight tolerances on functional surfaces, loading on the light side, below 25% parts by volume, protects part integrity and ensures media reaches complex features. For simple geometry parts in high-volume production, higher loading ratios improve throughput. For high-value or delicate parts, fixturing individual components in carriers that travel through the vibratory finishing process while holding parts away from each other is worth the setup cost.
Vibratory Finishing Media: Types and Selection
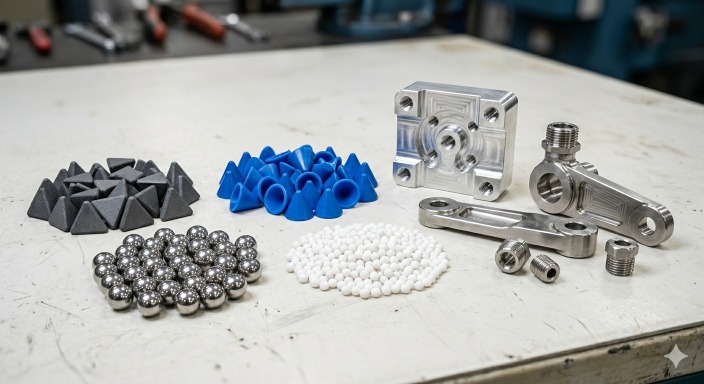
(AI generated) different vibratory finishing media types
One practical mistake is choosing media based only on aggressiveness. Media shape often determines finishing success more than hardness alone when parts contain deep pockets or intersecting features.
Ceramic Media
Ceramic media is the workhorse of vibratory deburring. Aluminum oxide or silicon carbide abrasive bonded in a ceramic matrix, hard, aggressive, long-lasting, and available in a huge range of shapes and sizes. Shops often validate ceramic media carefully on thin aluminum parts because aggressive cutting can round edges faster than expected during long cycles. On fresh CNC machined parts with visible burrs, tool marks, and sharp edges, ceramic media in the right shape and grit removes material quickly and produces consistent results across the batch.
The hardness that makes ceramic media effective for deburring also makes it aggressive enough to change dimensions on thin-section parts or round over edges that need to stay sharp. For precision parts with tight tolerances on critical features, ceramic media requires careful selection, short validation runs, and dimensional checks before production release.
Plastic Media
Plastic media, polyester or urea formaldehyde resin with embedded abrasive, is less aggressive than ceramic and better suited to finishing operations where deburring is already done and surface smoothing is the objective. It's also the right choice for softer materials like aluminum and zinc where ceramic would cut too fast and risk dimensional change.
For the classic vibratory finishing process on aluminum CNC parts going to anodize, plastic media in a medium grit produces a smooth, consistent surface that accepts anodize evenly across the part. Ceramic media on the same parts would over-cut and produce a rougher surface that anodizes inconsistently.
Steel and Specialty Media
Steel media is used primarily for burnishing rather than aggressive cutting. Instead, it burnishes and compacts it. Steel media in vibratory polishing operations compresses and smooths the surface rather than removing material, producing bright, work-hardened surfaces on metals that respond to burnishing. For stainless steel hardware, medical components, and precision parts where vibratory polishing to a reflective finish is the objective, steel media with the right burnishing compound is the standard approach.
Specialty media includes corn cob and walnut shell for dry polishing stages, plastic shapes for non-ferrous metals, and composite media with specific abrasive blends for specialized finishing requirements. Each serves a specific stage in the vibratory finishing process rather than being a general-purpose solution.
Media Shape and Cutting Action
Shape controls where the media contacts the part and which features it can reach. This is one of the most important decisions in vibratory finishing media selection and one of the least understood.
Triangles and stars reach into internal corners and right-angle features, a triangular ceramic piece rotating against an internal corner in a pocket actually contacts the corner geometry rather than bridging across it. Cylinders and balls work on external surfaces and open geometry. Cones reach into holes and recesses. Flat shapes work on flat surfaces but miss internal features. Wedge shapes clean up threaded features better than other geometries.
The general rule: media should be smaller than the smallest feature it needs to finish, and its geometry should allow it to contact the surfaces that need finishing rather than bridging over them. Media that's too large to enter a pocket or recess contributes nothing to finishing that feature, it just works on the external surfaces while the internal geometry stays unfinished.
Media Size and Surface Finish Control
Smaller media produces finer surface finish and reaches into finer features. Larger media removes material faster but leaves a coarser surface and can't access small holes or fine geometry.
For most production vibratory deburring on standard CNC machined parts, 10-20mm media hits the balance between cutting speed and feature accessibility. For fine precision parts with features below 5mm, media in the 3-8mm range is needed to reach and finish those features. For aggressive bulk deburring on large, heavy parts, 25-40mm media provides faster stock removal and longer media life.
Multi-stage processes use different media sizes, start with larger media to cut fast and remove significant burrs, finish with smaller media to refine the surface and reach fine features. This is how high-quality vibratory polishing operations achieve both efficient material removal and fine final finish without compromising on either.
Vibratory Deburring for CNC Components
Burr Removal After CNC Machining
Burrs from CNC machining fall into a few categories. Exit burrs at drill breakthrough, the material pushed ahead of the drill tip as it exits, folded over the edge. Milling burrs at profile edges, thin flaps of material left at the top of a milled wall. Cross-hole intersection burrs where two drilled holes meet inside the part, small jagged projections that manual deburring tools can't reach.
Vibratory deburring can address many of these burr types effectively, provided the media can reach the affected geometry. The media circulates around every accessible surface including internal features, cross-hole intersections, and undercuts that manual deburring misses. The abrasive action removes the thin burr material faster than it removes the solid edge material, which is what makes vibratory deburring selective, it preferentially removes raised projections while leaving the underlying geometry largely intact.
Edge Smoothing and Surface Safety
Beyond burr removal, vibratory finishing produces a controlled edge break on every machined edge. Sharp 90-degree machined edges are stress concentration points, can cut operators during assembly, and can chip under impact or thermal cycling. Vibratory deburring replaces these with a consistent small radius or chamfer that improves part durability and assembly safety simultaneously.
The edge break produced by vibratory finishing is more consistent than manual deburring. A technician deburring by hand produces different edge radii on different parts, different radii on different edges of the same part, and different results depending on attention level and fatigue. Vibratory deburring produces the same edge break on every accessible edge of every part in the batch.
Deburring Complex Geometries
This is where vibratory finishing offers a clear advantage over manual methods. Complex CNC machined parts, multi-sided components, parts with deep pockets, components with cross-drilled features and internal passages, have edges that manual deburring can't reliably reach. A file can't get into a 4mm wide pocket. A deburring tool can't reach a cross-hole intersection 30mm inside a bore.
Vibratory Polishing and Surface Finish Quality
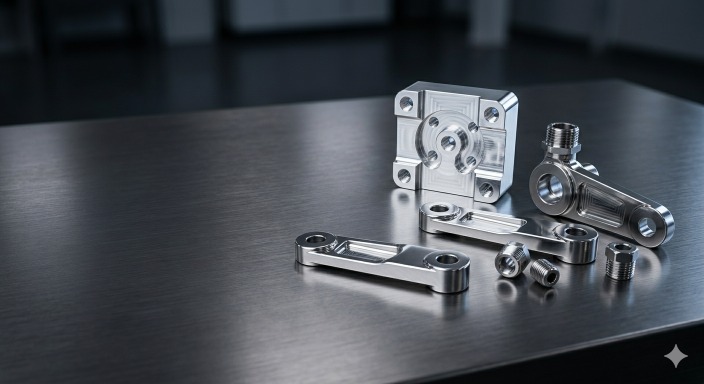
(AI generated) polished CNC machined metal parts after vibratory polishing process
Surface Smoothing and Brightness
Vibratory polishing is the same basic process as vibratory deburring, parts and media in a vibrating tub, but with media and compounds chosen for smoothing and brightening rather than cutting. The distinction is important: deburring focuses on burr removal and edge breaking, while polishing is intended to improve surface smoothness and appearance. Often both happen in sequence, deburring stage first with ceramic media, polishing stage second with plastic or steel media.
Surface finish improvement in vibratory polishing follows the media grit sequence logic of any abrasive finishing process. In multi-stage finishing, coarse media removes tool marks, medium media refines the surface, and fine or burnishing media produces the final finish. Skipping intermediate stages usually limits the final surface quality.
Matte vs Polished Finishes
Media selection and the final stage of the vibratory finishing process determine whether parts come out matte or polished.
Ceramic and plastic media with cutting compound produces a matte, uniformly textured surface, consistent across all parts but not reflective. This surface works well for parts going to powder coat, paint, anodize, or plating where a uniform, clean surface is the requirement rather than appearance of the base metal.
Steel ball burnishing or dry polishing with corn cob media in the final stage produces a bright, semi-reflective surface where the metal's natural appearance is visible. For stainless steel hardware, aluminum components where the machined finish is the final appearance, or parts where surface reflectivity is a functional requirement, this is the target. In some stainless steel applications, vibratory polishing with steel media can achieve surface roughness in the low sub-micron range, depending on the starting condition, media sequence, and cycle control.
Preparing Parts for Coating and Anodizing
Surface cleanliness and consistency before coating determines coating quality. A vibratory finishing process that produces a uniform, clean surface free of tool marks, burrs, and contamination gives coating processes a consistent starting point. Anodize layers that form over inconsistent surfaces show the inconsistency, variations in base metal surface finish produce variations in anodize appearance even when the chemistry and process parameters are correct.
The pre-anodize vibratory finishing process for aluminum typically uses plastic media with a mild cutting compound, run for 1-2 hours, producing a smooth consistent surface with Ra 0.4-0.8 µm. Parts come out clean, uniformly finished, and ready for the anodize line without manual preparation. The anodize result on vibratory-finished parts is more consistent than on as-machined parts because the starting surface is more consistent.
Common Vibratory Finishing Applications
Deburring Machined Metal Components
Production deburring on turned, milled, and ground components is the highest-volume application. Any part coming off a CNC machine with burrs, sharp edges, and tool marks that needs consistent finishing before assembly or coating runs through vibratory deburring as standard process.
Finishing Small Precision Parts
Vibratory finishing handles small precision parts, fasteners, pins, inserts, small housings, that would be impractical to finish manually at production volumes. The batch process handles hundreds or thousands of identical small parts simultaneously, producing consistent edge condition and surface finish across the entire batch.
Batch Finishing for High-Volume Production
Vibratory finishing is fundamentally a batch process and scales naturally with production volume. Adding more parts to a larger tub doesn't proportionally increase cost, the labor input per part decreases as batch size increases. For high-volume production runs, vibratory finishing cost per part is a fraction of manual finishing cost.
Advantages and Limitations of Vibratory Finishing
High-Efficiency Batch Finishing
The core advantage of vibratory finishing is labor efficiency at scale. One operator loads the machine, starts the cycle, and returns when it's done. During the cycle, the machine works without supervision. For shops running multi-shift operations, vibratory finishing runs through breaks, shift changes, and overnight. The throughput per labor hour is dramatically higher than any manual finishing method.
Process consistency is the second major advantage. Every part in a batch receives the same treatment. Edge breaks are consistent. Surface finish is consistent. The variation that manual finishing introduces, between operators, between shifts, between the beginning and end of a long day, is eliminated.
Surface Finish Consistency Benefits
Consistency across a production run has downstream value beyond the obvious. Consistent surface finish means consistent coating adhesion, consistent anodize appearance, consistent assembly behavior. Parts that come out of vibratory finishing with the same surface condition every batch behave predictably in all subsequent processes.
Limitations for Delicate or Large Parts
Vibratory finishing has hard limits. Large parts can be difficult to process efficiently in standard vibratory equipment, especially when the part size limits media circulation or causes part-on-part contact. Suitability should be evaluated against machine capacity and part geometry.
Thin-walled parts may deform during vibratory finishing, especially when rigid media, long cycle times, or aggressive machine settings are used. Extra validation is recommended for light-section geometries. Parts with features that trap media are problematic, media jammed into a blind hole during vibratory finishing can be extremely difficult to remove and may damage the feature trying to extract it. Extremely close-tolerance parts where dimensional change of even 0.01mm on critical features is unacceptable need careful process validation before committing to vibratory finishing.
Part Design and Suitability for Vibratory Finishing
| Design Feature | Vibratory Finishing Suitability | Risk | Mitigation |
|---|---|---|---|
| Thin walls below 1.5mm | Poor | Deformation from media impact | Use plastic media, reduce amplitude, or exclude from vibratory finishing |
| Blind holes smaller than the selected media | Poor | Media entrapment and incomplete cleaning | Use media that cannot enter the hole at all, use smaller media only when removal is reliable, or mask the feature |
| Through holes | Good | Media lodging or incomplete access if size is poorly matched | Select media that will pass through freely or is clearly too large to enter |
| Sharp decorative edges | Poor | Edge rounding changes appearance | Mask or exclude, or accept controlled edge break |
| Deep narrow pockets below 3mm wide | Moderate | Media can't reach feature | Select small-diameter media, accept that pocket interiors may not finish |
| Close tolerance bores ±0.01mm | Poor without validation | Dimensional change on bore diameter | Mask bores or validate material removal rate on test parts |
| External flat faces | Excellent | None | Standard vibratory deburring and finishing |
| Complex internal passages | Moderate | Media may not circulate through | Use small media, validate coverage |
| Heavy cross-section parts | Excellent | None | Standard process |
| Threaded features | Moderate | Thread form change at high removal | Short cycle time, soft media, validate thread gauge before and after |
| Surface finish requirement Ra below 0.2µm | Often challenging | Vibratory polishing doesn't reach this | Vibratory polishing followed by separate polishing operation |
| Parts requiring no edge break | Poor | Process produces edge break by design | Mask critical edges or use alternative process |
Vibratory Finishing vs Other CNC Surface Finishing Methods
| Factor | Vibratory Finishing | Sandblasting | Manual Polishing | Bead Blasting | Barrel Tumbling |
|---|---|---|---|---|---|
| Process type | Wet or dry abrasive mass finishing | Directed abrasive stream | Hand applied abrasive | Fine directed abrasive | Dry or wet mass finishing |
| Batch capability | Excellent, hundreds of parts per cycle | Poor, one or few parts at a time | Very poor, one part at a time | Poor to moderate | Good, similar to vibratory |
| Labor per part | Very low | Moderate | Very high | Moderate | Low |
| Internal feature access | Good with correct media | None, line-of-sight only | None without specialized tools | None, line-of-sight only | Similar to vibratory |
| Surface finish achievable | Ra 0.2-1.6µm typical | Ra 1.0-3.2µm | Ra 0.05-0.4µm | Ra 0.4-1.6µm | Ra 0.4-2.0µm |
| Deburring effectiveness | Excellent on accessible edges | Poor | Excellent with access | Poor | Good |
| Part size flexibility | Limited by tub size | Excellent, any size | Excellent, any size | Good for moderate sizes | Limited by barrel size |
| Dimensional change | Low with correct media and cycle | Low | Variable, operator dependent | Very low | Similar to vibratory |
| Consistency between parts | Excellent | Good with fixturing | Poor | Good with fixturing | Good |
| Cost per part at volume | Very low | Moderate | Very high | Moderate | Low |
| Best application | Production deburring and surface finishing of batches | Surface preparation, descaling, one-off parts | Final cosmetic polishing of individual parts | Uniform matte texture on individual parts | Similar applications to vibratory but typically less flexible |
| Worst application | Large single parts, very tight tolerances | Internal features, production batches | High volume production | Internal features, batch production | Parts with very fine features |
Vibratory finishing is one of the most practical surface finishing methods for CNC machined parts in batch production. It combines deburring, edge smoothing, cleaning, and surface refinement in a process that is more scalable and consistent than manual finishing. The best results depend on matching the media, compound, machine settings, and cycle time to the part material, geometry, and finish requirement. When validated correctly, vibratory finishing can reduce labor cost, improve consistency, and prepare parts more effectively for assembly, coating, or final use.
FAQ About Vibratory Finishing
Q: What is vibratory finishing used for?
Vibratory finishing is used to deburr, smooth, clean, polish, and improve the surface finish of machined or fabricated parts in batch production.
Q: What media is best for CNC machined parts?
Ceramic media works best for aggressive deburring, while plastic or porcelain media is preferred for finer vibratory polishing and cosmetic surface finishing.
Q: Can vibratory finishing remove machining burrs?
Yes, vibratory deburring is commonly used to remove light machining burrs, sharp edges, and residual tool marks from CNC machined parts.
Q: What is the difference between vibratory finishing and polishing?
Vibratory finishing includes deburring, edge breaking, and surface conditioning, while vibratory polishing focuses specifically on improving surface smoothness and shine.
Popular Articles
• Surface Finish in Machining, Types, Charts & Testing
• Anodizing vs. Hard Anodizing: The Differences in Surface Treatment Techniques
• Anodized Aluminum Colors: Options, Limits, and Real-World Results
• Explanation of different material surface treatment technologies in CNC machining
• How to choose between Laser marking and UV printing?
Keep Learning
Surface Finish in Machining, Types, Charts & Testing
What is Surface Finish in Machining? At its core, surface finish in machining refers to the small-scale irregularities left on the surface of a part after machining. These irregularities are typically grouped into three categories: Roughness: The fine, closely spaced deviations caused by the cutting process itself. Roughness depends heavily on feed rate, tool sharpness, and cutting speed. Waviness: Larger, more widely spaced variations caused by machine tool vibration, deflection, or thermal distortio......
CNC Machining Surface Roughness: A Practical Guide
Why Surface Roughness Matters in CNC Machining When we talk about CNC machining, precision isn't just about hitting the right dimensions, it’s also about how the surface feels and performs. Surface roughness describes the fine irregularities left on a machined surface, and it directly impacts how a part behaves in the real world. So, what is surface roughness? In simple terms, it's the measure of tiny peaks and valleys created by the cutting process. While they might look smooth to the naked eye, thes......
Optimizing Manufacturing Efficiency: A Guide to Computerized Numerical Control (CNC) Machining Surface Finishes
CNC Surface Finishes: Types, Costs, and How to Choose Quick Answer: Choose an as-machined finish when cost and dimensional stability matter most. Use bead blasting or brushing for a uniform cosmetic appearance, anodizing for aluminum corrosion resistance, hard anodizing for wear, and laser marking or UV printing for identification. Confirm material, tolerance, color, masking, and end-use environment before quoting. A CNC-machined part comes off the machine functional but rarely finished — tool marks, ......
Anodizing vs. Hard Anodizing: The Differences in Surface Treatment Techniques
Quick Answer: Choose Type II anodizing when corrosion resistance, color, and cosmetic appearance are the main requirements. Choose Type III hard anodizing when the part needs greater wear resistance and the coating thickness can be accommodated in the fit and tolerance plan. Confirm alloy, coating thickness, color, sealing, and critical dimensions before release. An aluminum bracket for an outdoor enclosure and a hydraulic cylinder rod both might get anodized — but specifying the same process for both......
How to Remove Anodizing from Aluminum Parts
Key Takeaways Chemical stripping is commonly used when anodizing needs to be removed from most or all of an aluminum part, but the process can also attack the underlying aluminum if it is not controlled. Mechanical removal works well for accessible areas but can change the surface texture and remove more base metal than intended. CNC machining gives better control when a defined anodized area needs to be removed from a precision part. Laser-based removal can be useful for controlled localized treatmen......
Anodizing Thickness: How Much Does It Add?
Anodizing Thickness and Dimensional Change at a Glance Feature Approximate dimensional effect One coated external surface +0.5 × coating thickness Outside diameter across two coated surfaces +1 × coating thickness Bore diameter with two coated walls −1 × coating thickness 60° thread pitch diameter Changes by about 4 × surface-growth amount, or about 2 × coating thickness under the 0.5× growth assumption Dimensional estimates below use the 0.5 × coating-thickness surface-growth relationship given in MI......