Anodized Aluminum Colors: Options, Limits, and Real-World Results
16 min
- What Is Anodized Aluminum
- What Is Aluminum’s Natural Color Before and After Anodizing
- Anodized Aluminum Colors Chart: What Colors Are Actually Available
- Aluminum Coloring Methods: How Anodized Colors Are Created
- Why Anodized Aluminum Colors Vary in Production
- How Part Geometry Affects Anodized Aluminum Color
- Common Anodized Aluminum Color Problems in Engineering
- How Color Choice Affects Cost and Production Stability
- How to Choose the Right Anodized Aluminum Color
- Common Design Mistakes That Lead to Color Issues
- How to Specify Anodized Aluminum Color for Production
- FAQ
Most people treat anodized color like a simple surface finish option in machining, but it doesn’t work that way in real jobs. It’s not merely about choosing a color from a chart and getting the same result every time.
In practice, the final color depends on the:
- Base material
- Surface preparation
- Process conditions during anodizing
At JLCCNC, we’ve seen the same color callout look slightly different between batches, even when nothing obvious has changed. Small shifts in alloy, oxide thickness, and dye conditions can move the shade enough to notice, especially on larger visible parts.
Another thing that shows up in production is variation across the same part. Edges, corners, and flat faces don’t always take color the same way. Moreover, rack position also plays a role.
This is why some colors that look fine on sample chips become harder to control in full runs in CNC machining. In most jobs, there’s a clear difference between colors you can produce once and colors you can repeat without issues.
If you need parts to match across batches, the focus shifts from “What colors are possible?” to “What colors stay consistent under normal shop conditions?”
What Is Anodized Aluminum
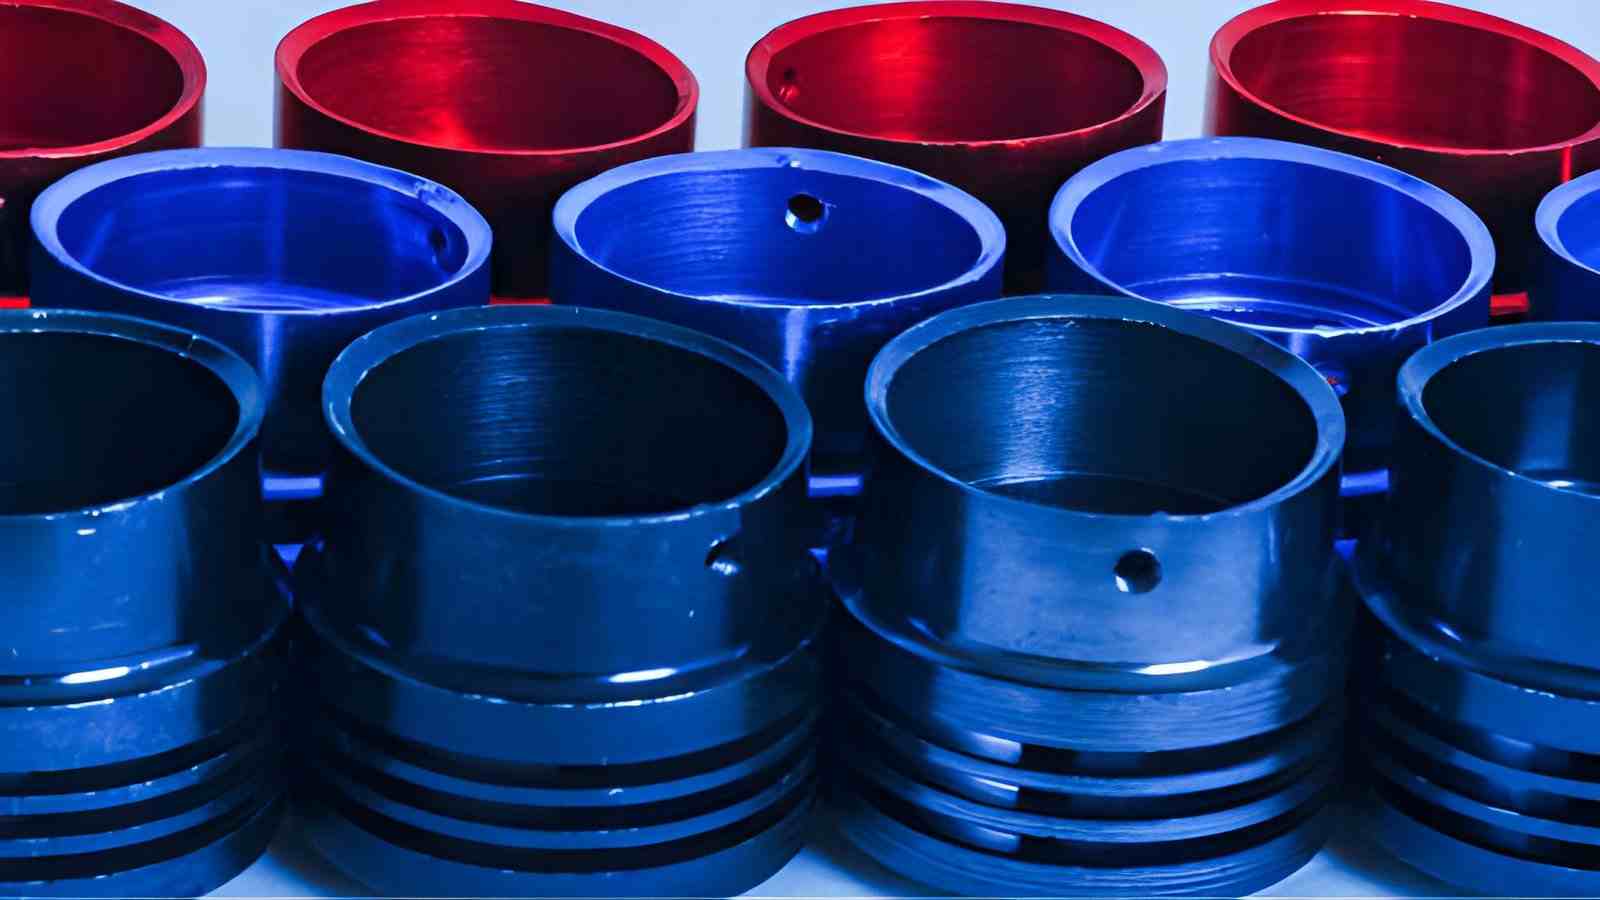
Image showing metal tubes arranged neatly with bright anodized colors. (Source: iStock)
Anodized aluminum is aluminum that has undergone an electrochemical process. It forms an oxide layer on the surface. This oxide layer is integral to the material, not a separate coating.
Right after anodizing, that layer has very fine open pores, and that is what makes coloring possible in the next step.
- The pores pull in dye instead of holding it on top.
- The sealing step closes the pores and fixes the color.
What Is Aluminum’s Natural Color Before and After Anodizing
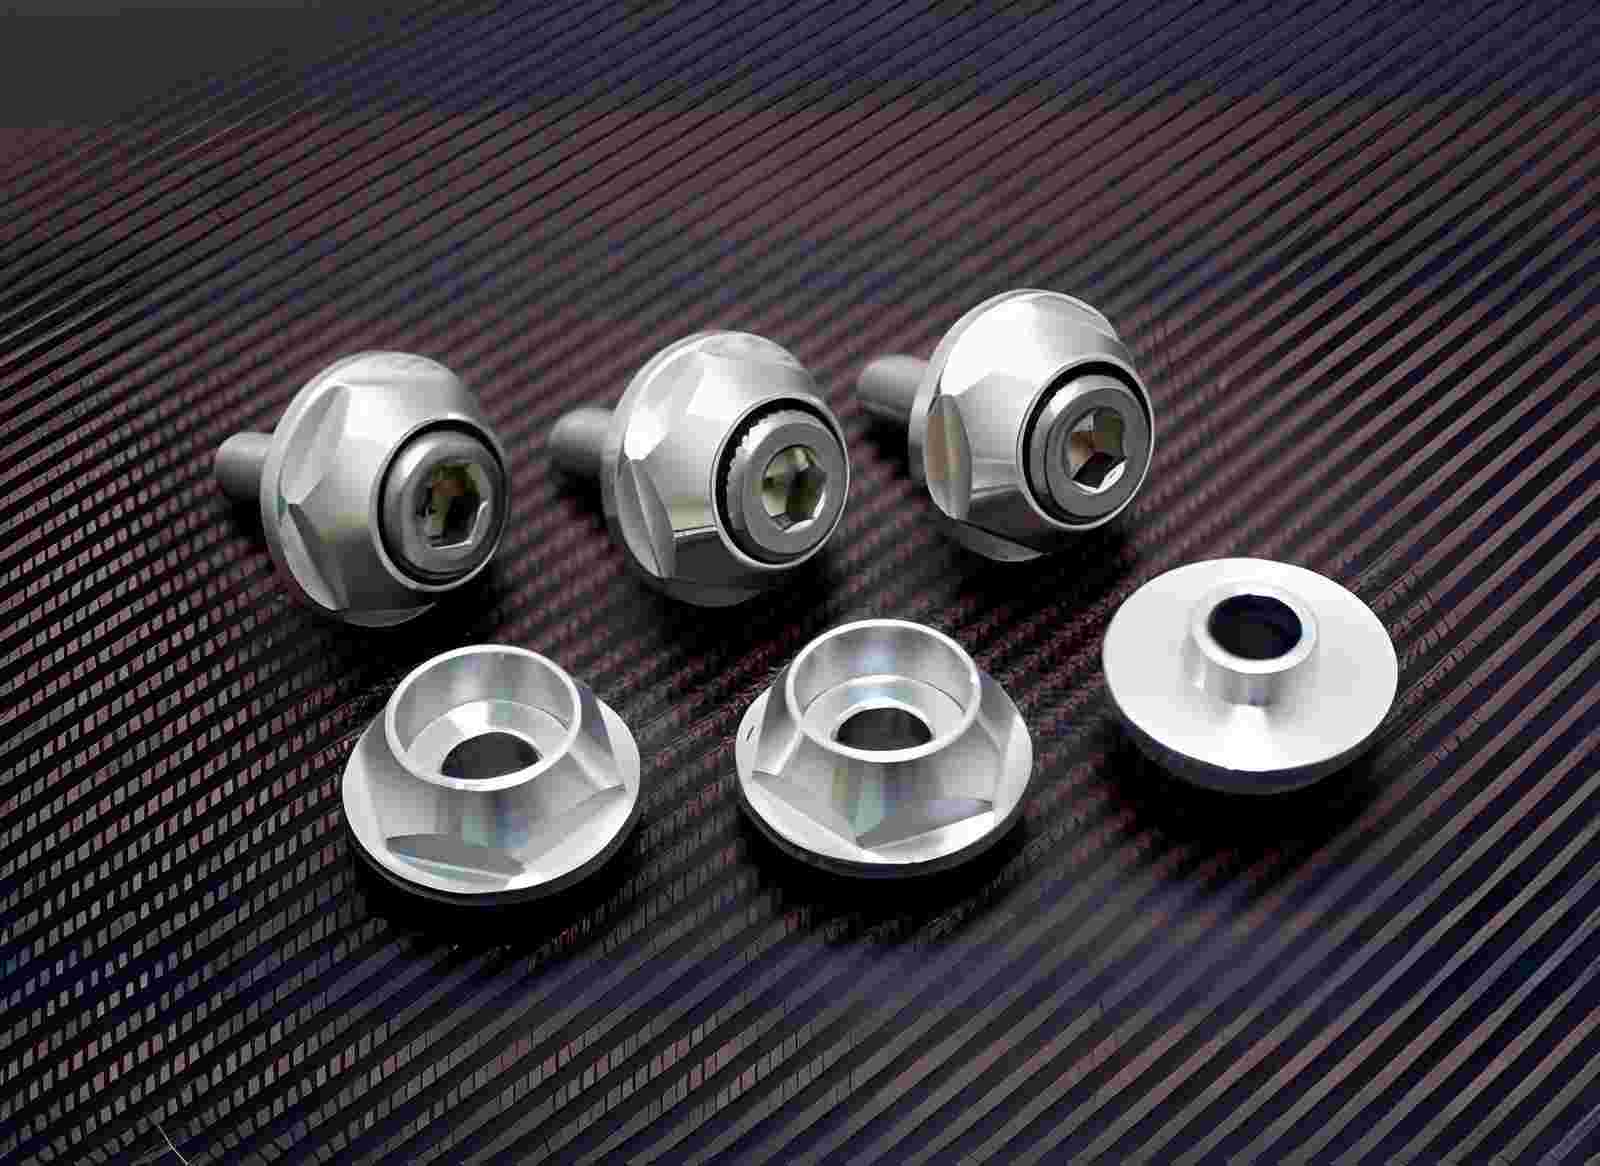
Close-up image of hex head bolt screws with threaded shafts and aluminum washers before the anodizing process. (Source: iStock)
In machining jobs, aluminum does not come out with a single clean color. Right off the machine, it usually looks silver-gray, but the surface defines how the cut went. Feed, tool wear, and chip flow all leave marks you can see under light. Over time, air also changes the surface, and the color shifts slightly.
- Fresh cuts look brighter when the tool is sharp, and the feed stays steady.
- Tool wear leaves dull spots and uneven reflection across the surface.
- Light machining marks can change how the part reflects light.
After machining, aluminum reacts with air. A thin oxide layer forms, and it starts to dull the shine. Usually, this change is subtle. However, you can see it on clean or polished surfaces. The part becomes less reflective and more consistent in tone.
- The oxide layer forms quickly after exposure to air.
- This layer reduces shine and gives a softer gray look.
- Longer exposure makes the surface look more uniform.
Aluminum is not reflective at all grades, and a finish after machining or polishing is a major factor. Practically, two components crafted of dissimilar alloys may just appear somewhat varied prior to anodizing.
- Different alloys produce slightly different base tones.
- Smooth surfaces reflect more light and look lighter.
- Rough surfaces scatter light and appear darker.
Anodized Aluminum Colors Chart: What Colors Are Actually Available
In most anodizing work, colors are not just picked from a chart and expected to repeat. What you get depends on how the process runs that day, the alloy, and how the parts are handled. Some colors remain steady, while others shift slightly between batches. In practice, the key difference is how well a color holds up under normal production conditions.
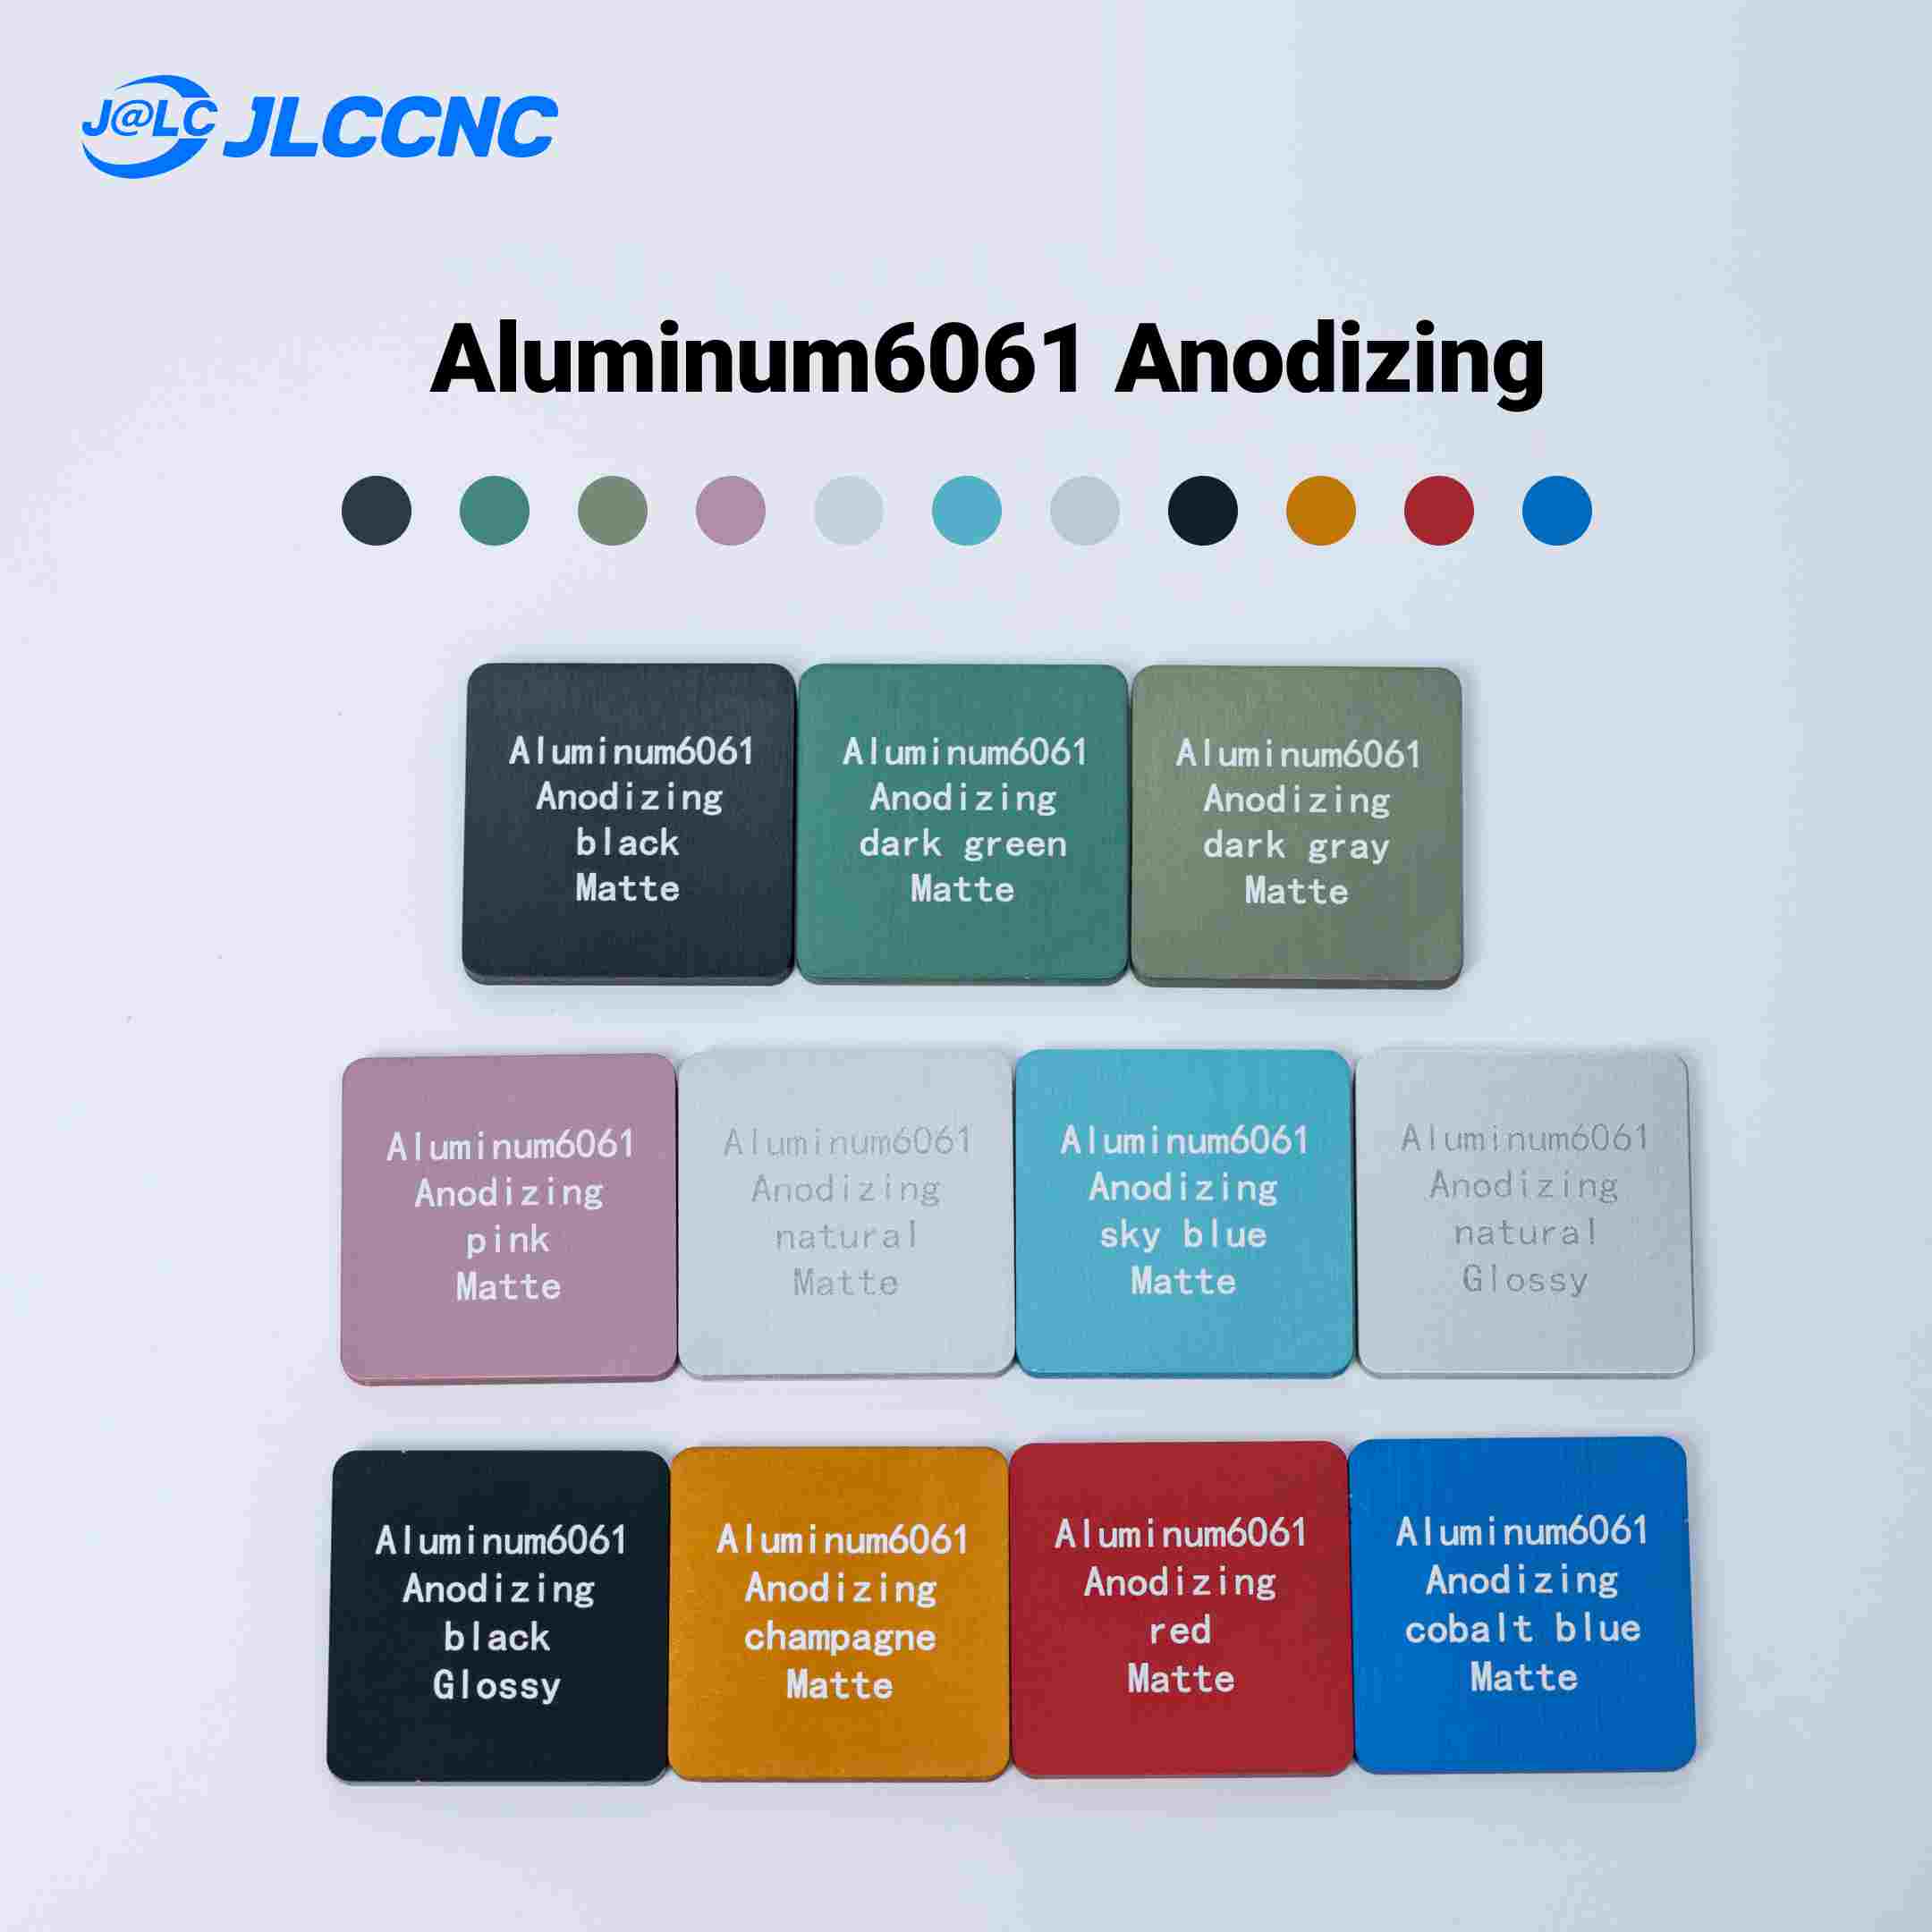
Image showing a collection of aluminum parts in different anodized colors arranged as a color palette.
Colors That Are Stable in Production
Black and dark tones are the most reliable in typical anodizing lines. Even when the oxide thickness fluctuates slightly, the visual difference is minor. In practice, we see long panels or housings for industrial equipment maintain a uniform appearance from batch to batch. Edges may be marginally lighter, but assemblies look consistent. Bronze and deep gray behave similarly, though corners on thick parts sometimes catch more current, producing subtle variations.
Colors That Are Achievable but May Vary
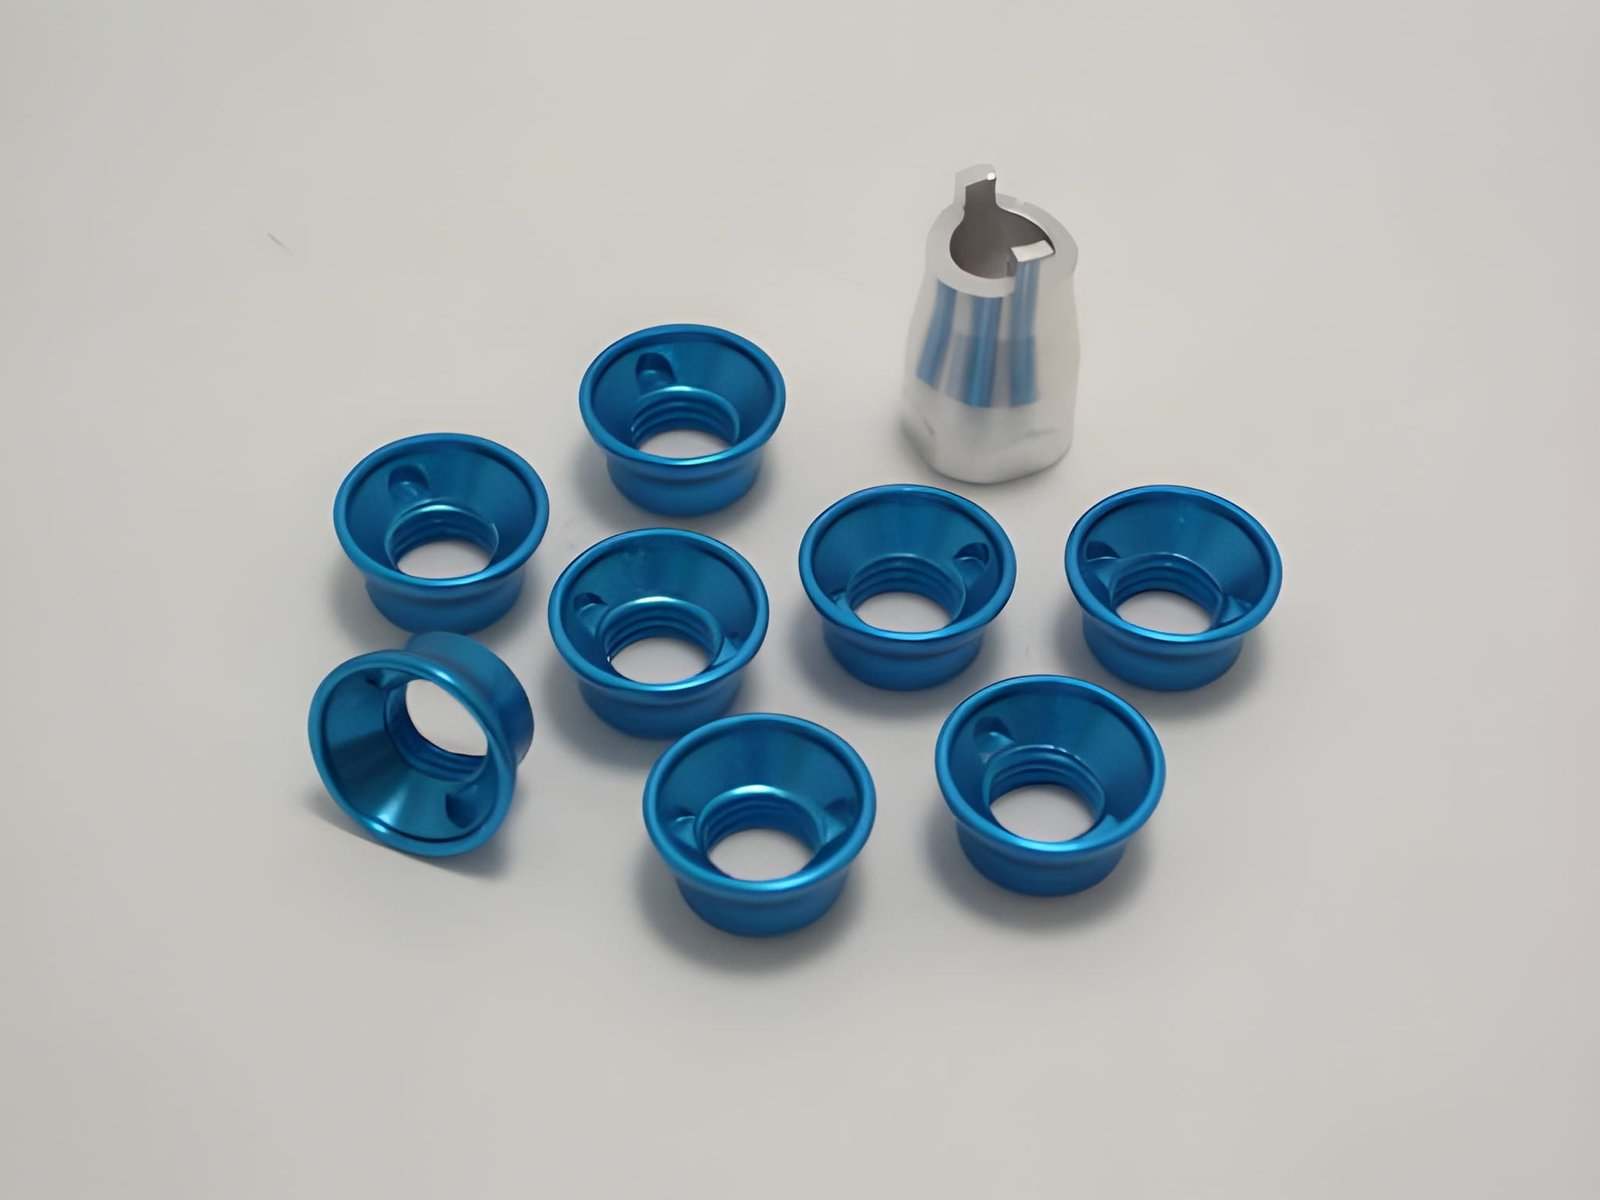
Image showing aluminum machine components with a blue anodized surface. (Source: iStock)
Blue, red, and gold are common, but they respond sensitively to the oxide layer, dye concentration, and bath conditions. In production, blue panels occasionally lean toward purple on certain edges, and red shades may darken on thick sections. Gold can develop streaks on large faces. Smaller components show fewer issues, but on pieces over 200–300 mm or multi-part assemblies, differences become noticeable. Engineers typically set an acceptable range rather than demanding exact matches.
Colors That Are Difficult to Control
In practice, these colors tend to move more when conditions change even a little.
- Light colors can show variation across large parts.
- Bright shades may not match perfectly between batches.
- Custom colors need tight control to stay consistent.
Aluminum Coloring Methods: How Anodized Colors Are Created
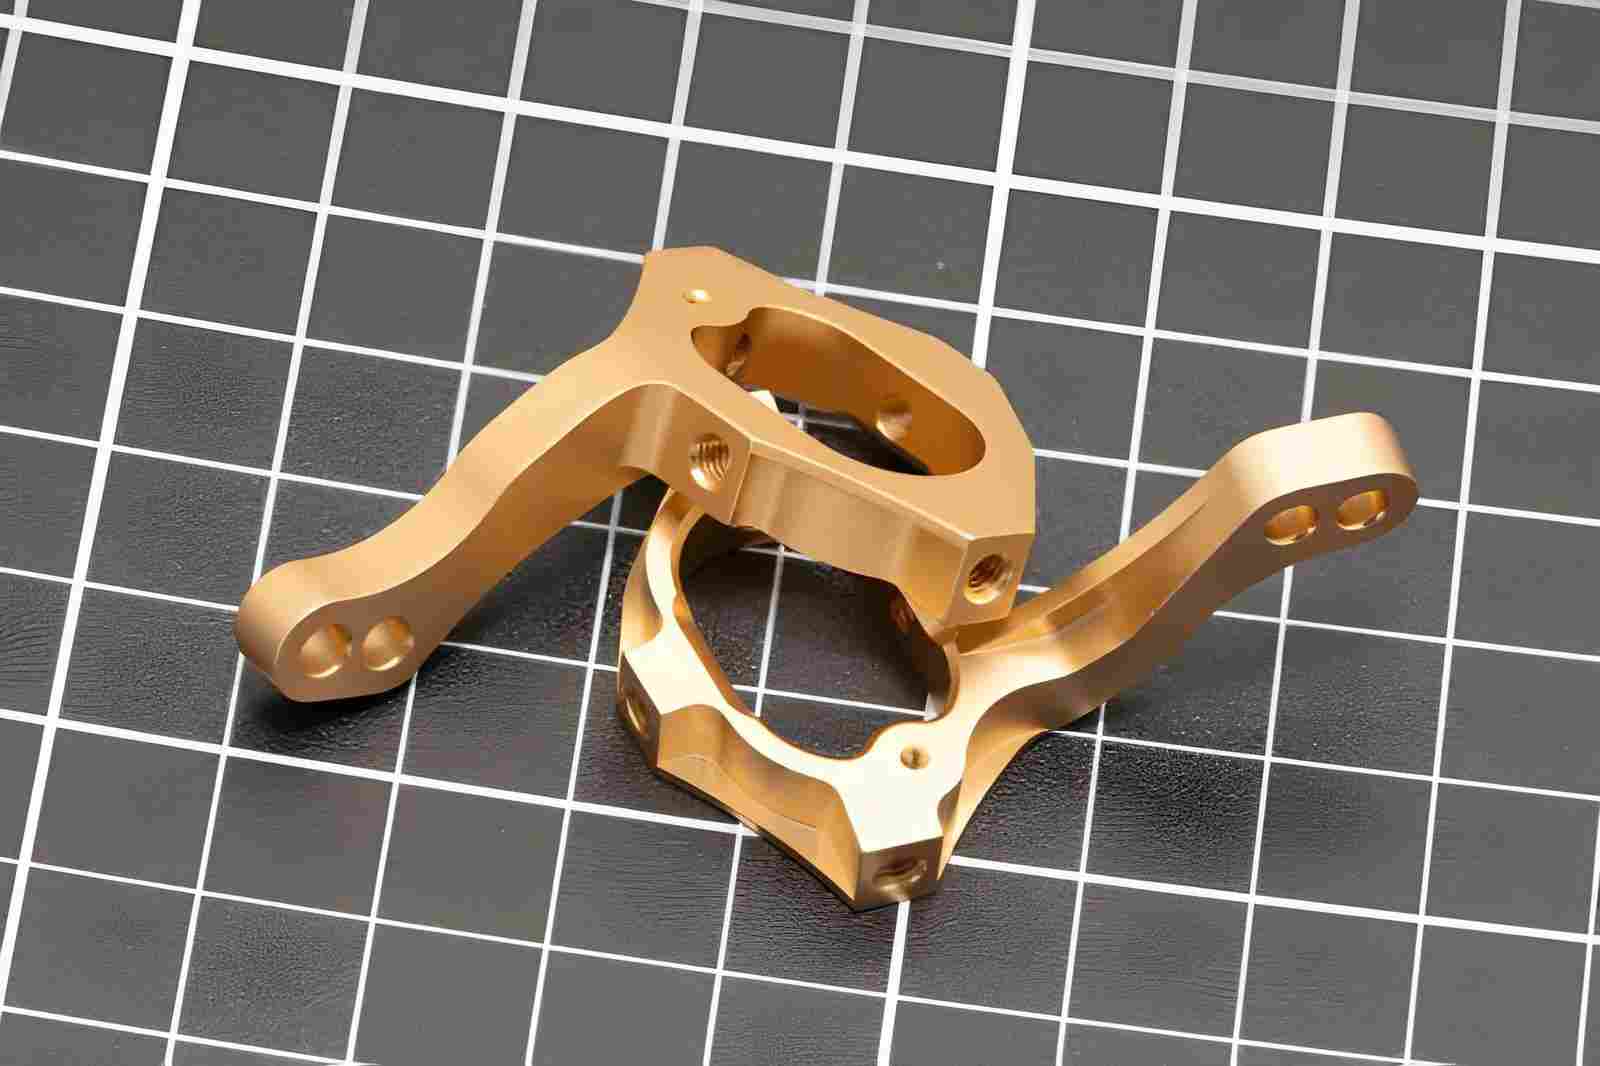
Image showing RC car chassis components made from anodized aluminum. (Source: iStock)
In anodizing, the coloring method changes what you can control. In practice, it affects two things: how many colors you can get, and how well those colors repeat. You don’t pick the method for appearance alone. You pick it based on how tightly your color needs to stay.
Dye Coloring
This method gives more color options, but control becomes more sensitive. In most jobs, small changes can show up in the final shade.
- Gives a wider range of visible colors.
- Color can shift with small process changes.
- Needs tighter control to keep batches matching.
Integral Coloring
This method builds the color during the process itself. It reduces variation, but also limits flexibility.
- Color forms as part of the anodizing process.
- Holds color more consistently across batches.
- Has the least flexibility in color selection.
Electrolytic Coloring
This method gives better repeatability, but limits the color range. It works when consistency matters more than variety.
- Produces more stable and repeatable tones.
- Works best for darker and muted shades.
- Offers fewer color choices overall.
Why Anodized Aluminum Colors Vary in Production
In most anodizing work, color is not fixed. You can run the same setup and still see small shifts between batches. In practice, this comes from changes in material, surface, and process conditions. When any of these move, the color moves with it.
JLCCNC helps control anodizing variables such as alloy consistency, surface preparation, and process parameters to improve color repeatability in production.
Alloy Differences
Different alloys do not behave the same during anodizing. The oxide layer forms differently, and that changes how color develops.
- Alloy changes how the surface layer builds.
- Dye takes in at different rates across alloys.
- The same setup can give different tones on each alloy.
If you want a closer look at how these two grades differ before finishing, see our guide on aluminum 6061 vs 7075.
Surface Finish Before Anodizing
The starting surface affects how the color comes out. In most jobs, this is where variation begins.
- Tool marks can change how light reflects.
- Rough surfaces tend to look darker.
- Smooth surfaces give a more even color.
Film Thickness and Current Density
The layer thickness controls how much dye the part holds. Small changes here show up in the final result.
- Higher current tends to build a thicker layer.
- Thickness changes how much color is taken in.
- Uneven current can create tone differences.
Dye Concentration and Temperature Control
The dye bath affects how the color settles into the surface. Small shifts can change the shade.
- A stronger dye gives a deeper color.
- Temperature changes can shift the tone.
- Poor control can cause batch differences.
How Part Geometry Affects Anodized Aluminum Color

Image showing multiple CNC-machined aluminum parts with different anodized colors. (Source: iStock)
Part geometry changes how current flows during anodizing. It also affects how dye penetrates the surface. These factors directly influence the final color and consistency.
Sharp Edges Tend to Appear Lighter
Edges often come out slightly lighter than flat areas. This is more visible on dyed finishes such as black or blue.
On CNC housings with long outer edges, the difference can be seen under direct light, especially when parts are placed side by side. The effect becomes stronger when edges are sharp or not broken.
In practice, adding a small radius (for example, 0.5–1 mm) usually makes the transition less noticeable.
Deep Cavities Are Difficult to Dye Evenly
Color inside pockets or deep features tends to shift. In many cases, cavities appear darker or uneven compared to external faces.
This shows up on parts with:
- recessed logos
- deep counterbores
- internal channels
On parts deeper than roughly 2–3 times the opening width, color consistency becomes harder to maintain. Agitation and fixturing help, but variation is still common in dyed finishes.
Thickness Variation Affects Current Distribution
Parts with uneven wall thickness often show slight color shifts across the surface.
For example:
- Thick mounting bosses may appear darker
- Thin sheet sections may look lighter
- Transitions between sections can form visible bands
This becomes more noticeable on large parts (over ~200 mm) or when multiple sections are visually continuous.
Keeping wall thickness more uniform doesn’t eliminate variation, but it reduces how obvious it looks in the final assembly.
Common Anodized Aluminum Color Problems in Engineering
Anodizing does more than change appearance. It also affects fit, wear behavior, and electrical conductivity. These changes can impact how a part performs in real use.
Coating Thickness Can Affect Dimensional Fit
Anodizing adds a thin oxide layer on the surface. This layer increases part dimensions slightly. In tight-tolerance parts, this can create fitting issues.
- Parts may become too tight after anodizing.
- Critical fits can require masking or compensation.
- Pre-machining allowances help avoid assembly problems.
Color Variation Can Signal Uneven Coating
Uneven anodized color often means uneven oxide thickness. This usually comes from inconsistent current distribution or surface prep. It can indicate process variation in production.
- Light and dark patches suggest uneven coating.
- Poor surface preparation leads to inconsistent results.
- Process control is needed for repeatable output.
Hard Anodizing Improves Wear Resistance but Affects Color
Hard anodizing creates a thicker and harder surface layer. This improves wear resistance but often results in darker or less uniform color. It is more about function than appearance.
- Hardened anodized parts resist wear and abrasion better.
- Hard anodizing is likely to have darker shades.
- It is appropriate for functional parts, rather than cosmetic finishes.
If the difference between standard anodizing and hard anodizing is still part of the decision, see anodizing vs hard anodizing.
How Color Choice Affects Cost and Production Stability
Color choice in anodizing directly affects production time and cost. Some colors process faster, while others require extra steps. Batch size and consistency also play a role in results.
Black Anodizing Is Usually the Fastest Option
Black is the most common anodizing color. It uses standard dyes and well-established processes. This keeps production simple and repeatable.
- Black dye is widely available and stable in use.
- Processing time is shorter compared to custom colors.
- It is often the most cost-effective finishing option.
Custom Colors May Require Extra Sampling
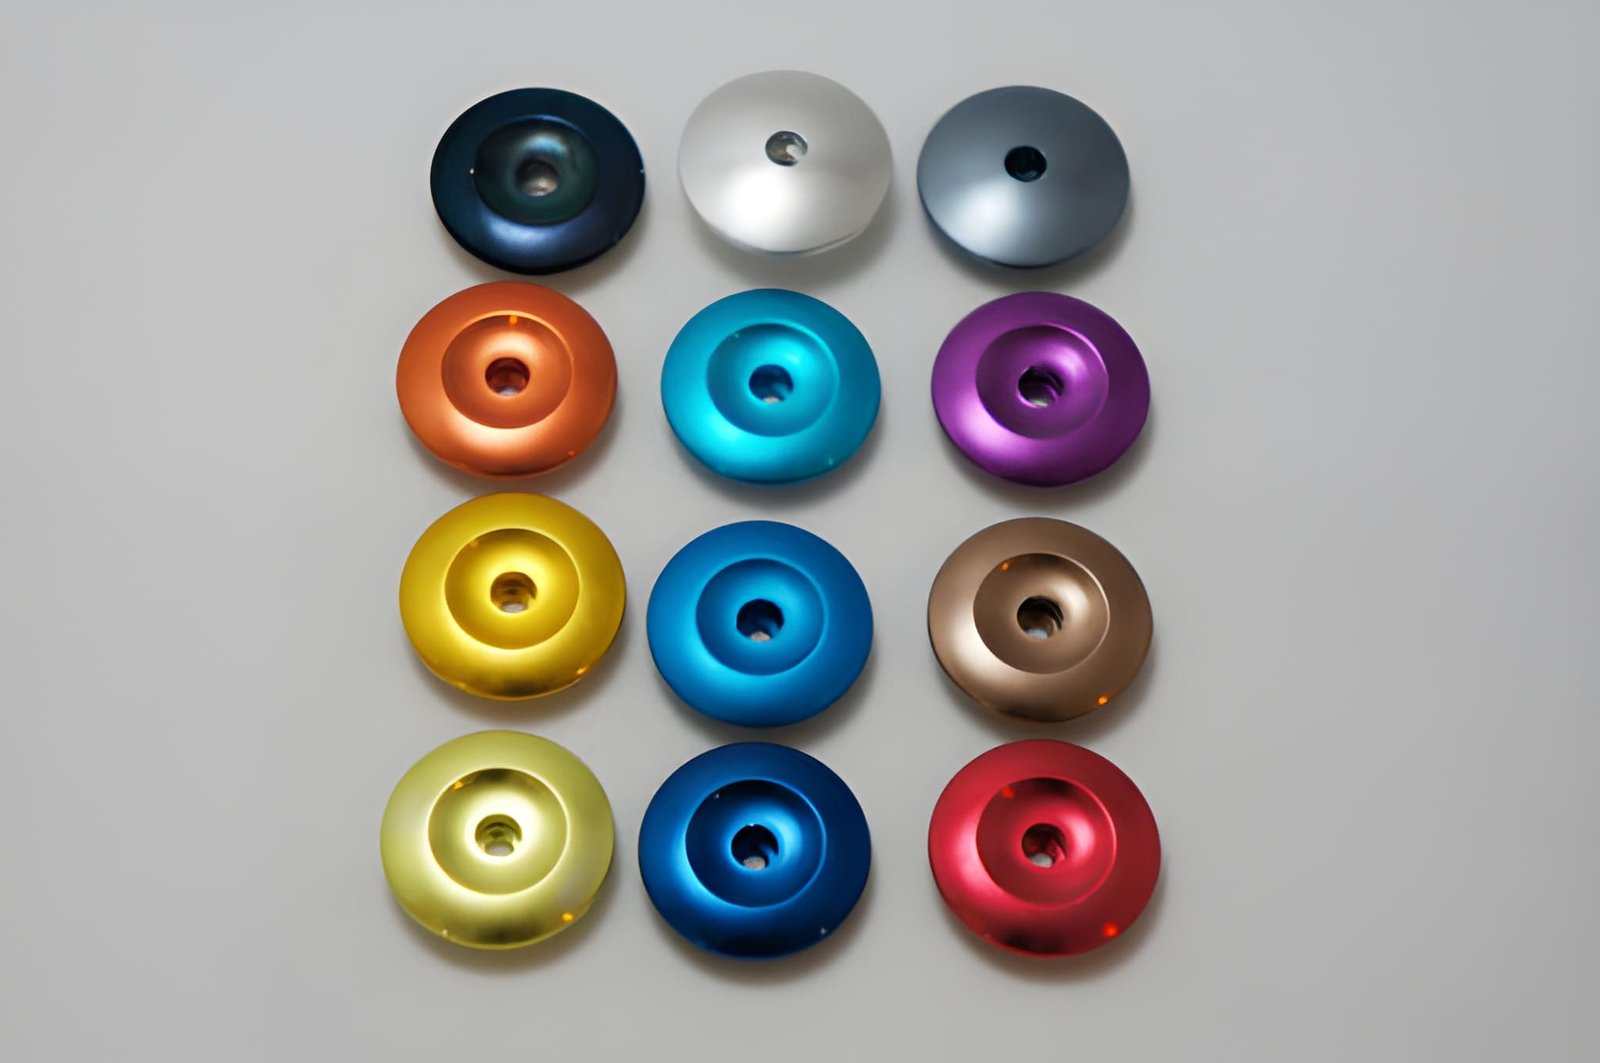
Image of aluminum parts produced on a CNC turning machine and finished with anodizing. (Source: iStock)
Custom colors are not always straightforward. They often need test runs to match the required shade. This adds time before full production starts.
- Samples are needed to confirm color accuracy.
- Adjustments may be required before final approval.
- Extra steps increase both time and cost.
Small Batches Can Show More Color Variation
Smaller production runs are harder to control. Minor changes in surface prep or process conditions become more noticeable. This can lead to inconsistent color across parts.
- Color may vary slightly between parts.
- Process stability is harder to maintain in small runs.
- Careful control is needed for consistent results.
How to Choose the Right Anodized Aluminum Color
Color selection depends on function, process capability, and tolerance limits. In anodizing, color comes from oxide layer thickness and dye absorption. Any instability in the process will directly affect the final shade.
Start From the Functional Requirement
Define the operating conditions before selecting a color. Exposure, wear, and assembly requirements set the limits for acceptable finishing. Color should not override these constraints.
- Confirm environmental exposure, such as UV, humidity, or abrasion.
- Identify whether the surface serves structural or cosmetic purposes.
Match Color to Process Capability
Different colors respond differently during anodizing. Black and standard shades are more stable due to consistent dye absorption. Custom colors depend heavily on bath control and process parameters.
- Black and standard colors offer more stable and repeatable results.
- Custom shades increase sensitivity to bath chemistry and process variation.
- Dye uptake depends on current density and electrolyte stability.
Validate With Samples Under Process Conditions
Samples reflect controlled conditions, not production variability. Differences in alloy composition, surface preparation, and process parameters will affect the final result.
- Use samples produced under matching process conditions.
- Consider alloy grade and surface finish differences.
- Treat samples as reference points, not final acceptance criteria.
Define Acceptable Color Tolerance Early
Anodized finishes naturally vary within a range. Establishing tolerance limits early allows you to control quality and reduce rework during production.
- Define acceptable shade variation before production begins.
- Align color tolerance with functional or visual requirements.
- Confirm acceptance criteria with the supplier in advance.
Align Selection With Repeatability in Production
Some colors require tighter process control and may vary across batches. Selection should consider whether the finish can be consistently reproduced at scale.
- Choose colors with proven repeatability in production runs.
- Avoid finishes that depend on narrow process windows.
- Verify that the supplier can maintain consistent results across batches.
Common Design Mistakes That Lead to Color Issues
Most color problems start before any part reaches the anodizing line. In practice, these issues come from missing details in the drawing or unclear expectations. Small oversights at this stage can lead to confusion later in production.
Specifying Color Without Defining Surface Finish
Color alone does not define the final look. When the finish is not specified, results can vary from part to part.
- The same color can look different on different finishes.
- Missing finish details leave room for interpretation.
- The final look depends on both color and surface.
Mixing Different Alloys in One Assembly
Using different alloys in one assembly often creates visible differences. In most jobs, this becomes clear when parts are compared side by side.
- Different alloys respond differently during processing.
- Color differences show up within the same assembly.
- Matching becomes difficult when materials are mixed.
Ignoring Surface Roughness Before Anodizing
Surface roughness directly affects how the part looks after finishing. If this is not controlled, variation shows up later.
- Rough and smooth areas reflect light differently.
- Uneven prep leads to uneven appearance.
- Surface condition must stay consistent across parts.
Relying Only on Visual References Instead of Samples
Visual references alone are not enough in most cases. Real samples give a better picture of what to expect in production.
- Charts do not reflect actual production conditions.
- Samples help confirm the expected outcome.
- Without samples, results can be misunderstood.
How to Specify Anodized Aluminum Color for Production
Color specification in anodizing needs clear technical details, not just a name or sample. You are defining process parameters that control oxide formation and dye absorption. A well-defined specification reduces variation and avoids rework during production.
Define the Color Using a Reference System
Color should be tied to a measurable reference, not a visual description. This helps the supplier control the result more accurately across batches.
- Use Pantone or RAL references when possible.
- Provide physical samples for closer matching.
- Avoid vague terms like “dark gray” or “metallic blue.”
Specify Material and Surface Condition
The base material and surface finish directly affect color output. Different alloys and finishes absorb dye differently during anodizing.
- State the exact aluminum alloy grade.
- Define surface finish, such as brushed or polished.
- Note that different alloys may produce slight color shifts.
Include Anodizing Type and Thickness
Anodizing type and oxide thickness influence both color depth and durability. This also affects how the dye penetrates the surface.
- Specify standard or hard anodizing if required.
- Define oxide thickness range where applicable.
- Link thickness to performance needs, such as wear or insulation.
Set Tolerance for Color Variation
Color variation is expected in anodizing. Defining acceptable limits helps control quality during production.
- Define acceptable shade range instead of an exact match.
- Use ΔE or visual acceptance where required.
- Agree on tolerance limits with the supplier early.
Work Closely With the Supplier
Color control in anodizing depends on process expertise. Clear communication with your supplier ensures better control over the final result.
- Share drawings, samples, and technical requirements.
- Discuss process limitations before finalizing color.
- Confirm feasibility before starting production.
JLCCNC provides anodizing for parts that need repeatable color results in production, with process support for multiple alloys, surface conditions, and batch sizes from sampling to volume orders. Upload your CAD file to evaluate anodized color feasibility, tolerance, and batch consistency before production.
FAQ
Q: Can anodized aluminum fade over time?
Yes, anodized color can fade over time. In practice, sunlight and regular wear slowly affect the surface. Indoor parts usually hold their color longer, while exposed parts may show a gradual change.
Q: Can anodized aluminum colors be matched exactly?
Exact matching is difficult. Small differences in alloy, surface, or process conditions can shift the color slightly. In most jobs, matching works best within the same batch.
Q: What is the most consistent anodized color?
Darker colors are generally more consistent. They tend to handle small process changes better. Lighter shades often show more variation between batches.
Q: Why do anodized parts from different batches look different?
Batch-to-batch variation is normal. In practice, small changes in material, surface condition, or process setup can affect the final color. These differences become visible when parts are compared side by side.
Q: Does anodizing affect dimensions or tolerances?
Yes, anodizing adds a thin layer to the surface. In most jobs, this slightly changes dimensions. Parts with tight tolerances usually need this accounted for before anodizing.
Q: Why does anodized aluminum look different under lighting?
Anodized color is affected by how the surface reflects light. The same part can look slightly different under daylight, warm indoor light, or direct inspection lighting. Surface finish and viewing angle also make the shift more noticeable.
Q: Can anodized colors be controlled within tolerance?
Yes, but only within a practical range. Color can be controlled closely when alloy, surface finish, and process conditions stay consistent. Exact visual matching across every batch is harder, especially for brighter or custom colors.
Q: What is the most repeatable anodized finish?
Black anodizing and clear anodizing are usually the most repeatable in production. They are more commonly used and generally easier to keep stable than bright dyed colors.
Popular Articles
• How to choose between Laser marking and UV printing?
• Anodizing vs. Hard Anodizing: The Differences in Surface Treatment Techniques
• What is Bead Blasting Finish in CNC? A Complete Guide
• Surface Finish in Machining, Types, Charts & Testing
• Explanation of different material surface treatment technologies in CNC machining
Keep Learning
Understanding the role of surface finish in CNC machining: how to improve part performance and life?
In precision manufacturing, surface finish is one of the core indicators of CNC machining quality, directly affecting part friction performance, sealing, corrosion resistance and fatigue life. Whether it's aerospace gears or medical implants, precise control of surface roughness (Ra value) has become the key to breaking through technological barriers. In this article, we will analyse the definition of surface finish, influencing factors and optimisation strategies, and share how to achieve the ultimat......
Magnetic Abrasive Finishing: Process, Applications, and Benefits for CNC Machined Parts
Key Takeaways and Introduction About Magnetic Abrasive Finishing Magnetic abrasive finishing uses a magnetic field to control abrasive particles. The process improves surface finish and removes fine burrs. It can reach internal passages and difficult-to-access features. Magnetic deburring is often used on precision machined components. Media selection and magnetic field strength strongly affect results. Magnetic abrasive finishing of precision metal tube Precision metal parts might need more than accu......
Laser Etching: Complete Technical Guide to Process, Materials, and Industrial Applications
Laser etching is widely used in manufacturing, product design, and industrial marking. However, it is often confused with laser engraving and laser marking, which can lead to incorrect process selection. This guide explains its core principles, process, materials, and industrial applications in a structured way. H2: What Is Laser Etching? H3: Engineering Definition of Laser Etching At its core, laser etching is a process that uses a focused laser beam to alter the surface of a material permanently. Un......
Coating vs Painting: Key Differences for CNC and Industrial Manufacturing
If you’ve worked in CNC machining or metal fabrication long enough, you eventually stop treating “coating vs painting” as a terminology debate. It becomes a design constraint problem. Because in real manufacturing, surface finishing is not applied at the end of the process—it directly influences whether parts assemble correctly, maintain tolerance, and survive in service environments. In many failed projects, the root cause is not machining accuracy, but an unaccounted coating system that changes geom......
How to Anodize Aluminum: Complete DIY & CNC Manufacturing Guide
Key Takeaways Anodizing grows an oxide layer from the aluminum itself instead of adding a separate coating on top. Type II anodizing is commonly chosen for appearance-focused parts, while Type III hardcoat anodizing is used more often on sliding or wear-prone components. Surface condition before anodizing still shows afterward. Tool marks, scratches, bead blasting, and polishing all remain visible. Hole sizes, thread fit, and sliding clearances can change after anodizing because the oxide layer grows ......
Sulfuric Acid Anodizing for Aluminum in CNC Manufacturing
Key Takeaways About Sulfuric Acid Anodizing Sulfuric acid anodizing is the most widely used anodizing process for CNC-machined aluminum parts. The process creates an integral oxide layer that improves corrosion resistance, wear resistance, and surface appearance. Coating thickness affects both performance and dimensional growth, making tolerance planning important for precision components. Aluminum alloy selection influences anodizing quality, color consistency, and final surface appearance. Type II s......