Cutting Plexiglass: Methods, Tools, and Best Practices
19 min
- What Is Plexiglass?
- Best Way to Cut Plexiglass
- How to Cut Plexiglass
- 5 Plexiglass Cutting Tools
- Cutting Plexiglass with a Saw
- Cutting Plexiglass Without Cracking
- CNC and Laser Cutting Plexiglass
- Common Mistakes When Cutting Plexiglass
- Safety Tips for Cutting Plexiglass
- FAQs About Cutting Plexiglass
Key Takeaway
- The best way to cut plexiglass depends on thickness, edge quality requirements, and production volume.
- Thin plexiglass under 6mm scores and snaps cleanly with a utility knife.
- Medium thickness up to 12mm cuts well with a fine-tooth saw blade at controlled speed.
- Thick plexiglass above 12mm or complex shapes need a CNC router or CO₂ laser cutter.
- Cutting plexiglass without cracking requires proper support within 50-100mm of the cut line, correct blade type, and controlled feed rate.
- CNC and laser cutting are the preferred plexiglass cutting tools for production quantities and precision work.
- Removing the protective film before cutting is a common mistake that can increase the risk of surface scratches and marking errors.
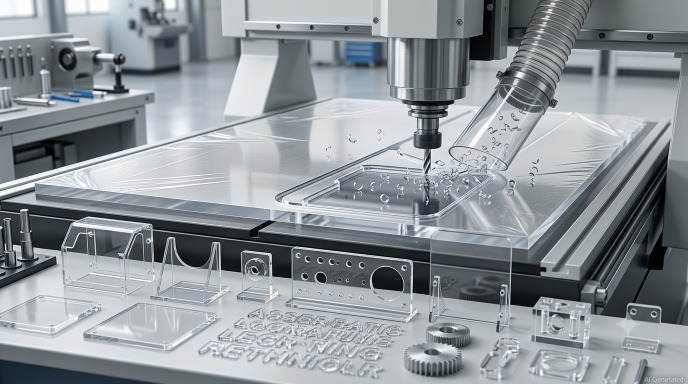
(plexiglass) CNC router cutting plexiglass sheet
Plexiglass, also known as acrylic sheet or PMMA, cuts cleanly when the correct tools and techniques are used. Although acrylic is lightweight, transparent, and easy to handle, incorrect tool selection, cutting speed, or insufficient support can result in cracks, chips, or melted edges. However, incorrect tool selection, blade speed, or insufficient support can quickly cause visible cutting problems. A crack that runs from the cut line to the edge doesn't fix itself.
Cutting plexiglass is straightforward when the correct tools and parameters are used, once you understand the factors that actually matter: blade geometry, heat management, support, and cutting speed. When these factors are controlled correctly, you can achieve clean, chip-free edges. When they are not, the sheet may crack or the cut area may melt and develop a rough surface.
What Is Plexiglass?
Plexiglass is a trade name commonly used for acrylic sheet, a transparent thermoplastic made from polymethyl methacrylate (PMMA). In manufacturing and fabrication contexts, plexiglass and acrylic often refer to the same material.
Acrylic sheets are widely used for displays, protective covers, signage, machine guards, and transparent components because they combine optical clarity, lightweight properties, and good weather resistance.
When discussing acrylic sheet cutting, the same machining principles apply to plexiglass, including proper tool selection, heat control, and support during cutting.
Best Way to Cut Plexiglass
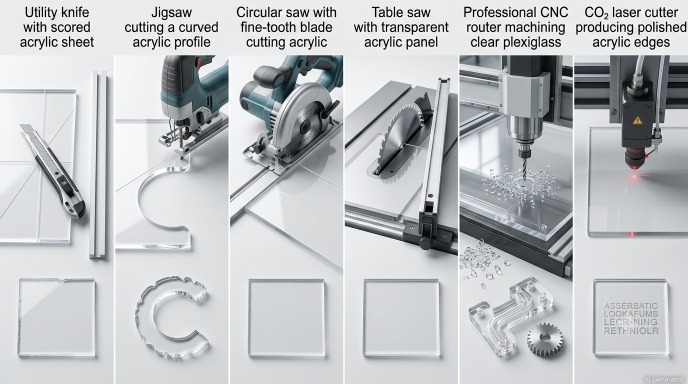 Plexiglass cutting methods comparison
The best way to cut plexiglass is not universal; it depends on the thickness, required edge quality, shape complexity, and available equipment for the project.
A score-and-snap on thin plexiglass with a utility knife produces clean straight cuts in under a minute. That same utility knife applied to 15mm thick plexiglass with a curved cut line produces cracks and frustration. Choosing the correct method for each situation determines whether the process produces clean results or unnecessary material waste.
For production parts requiring consistent dimensions and repeatable edge quality, CNC machining can be a more suitable option than manual cutting methods. JLCCNC provides CNC machining services for acrylic, plexiglass, and other engineering plastics, with parts reviewed against manufacturing standards before production.

Precision CNC Machining Service
Professional manufacturing, fast turnaround, and quality assurance.
Factors That Affect Cutting Quality
Material thickness is the primary factor. Below 3mm, score-and-snap is the fastest clean-cut method. From 3-12mm, powered saws work well with correct blades. Above 12mm or for curved and complex cuts, CNC routing and laser cutting can provide more consistent results than most manual methods.
Edge quality requirements matter next. For a hidden edge that won't be seen, a saw cut is adequate. For a polished transparent edge used in a display or optical component, laser cutting produces a flame-polished edge straight off the machine. CNC routing produces a clean edge that can be flame or solvent-polished afterward.
Production volume changes the economics. Cutting plexiglass by hand for a one-off project is sensible. CNC and laser plexiglass cutting tools solve the production volume problem with consistent, repeatable results.
Choosing the Right Cutting Method
| Thickness | Best Cutting Method | Edge Quality | Speed |
|---|---|---|---|
| Under 3mm | Score and snap | Good | Very Fast |
| 3-6mm | Utility knife, jigsaw, or circular saw | Good-Very Good | Fast |
| 6-12mm | Circular saw, table saw, jigsaw | Good | Moderate |
| 12-25mm | Table saw, CNC router | Very Good | Moderate |
| Any thickness (complex shapes) | CNC router or laser cutter | Excellent | Fast (production) |
| Any thickness (optical edge quality) | CO₂ laser cutter | Excellent (flame finish) | Moderate-Fast |
The right cutting method depends on whether the project requires a single custom cut, repeat production, or a high-quality optical edge.
Hand tools are suitable for simple DIY cuts and small projects. CNC machining is preferred for repeat production and complex acrylic parts where consistency is important. Laser cutting is commonly selected when a flame-polished edge appearance is required.
CNC Router for Plexiglass Cutting
CNC routing is a common choice for acrylic CNC machining when projects require repeatability, complex geometries, or controlled dimensional accuracy. Unlike manual cutting methods, CNC routers can follow digital tool paths to produce consistent acrylic parts across prototypes and production quantities.
Using suitable acrylic cutting tools, such as O-flute router bits, helps improve chip evacuation and maintain edge quality during machining.
CNC machining is also widely used in acrylic fabrication for applications such as displays, machine covers, enclosures, and custom transparent components.
How to Cut Plexiglass
The process of how to cut plexiglass follows the same logical sequence regardless of which specific tool is used, preparation, marking, securing, cutting, and finishing. Skipping steps in this sequence is where most damage occurs.
Step 1: Prepare the Plexiglass Sheet
Keep the protective film on the plexiglass throughout the cutting process. The film protects against scratches from clamps, work surfaces, and debris during cutting. It also provides a clean surface for marking cut lines in pencil or marker without the lines being confused with the material surface.
Inspect the sheet for existing cracks before cutting. A hairline crack that isn't visible becomes a cut-following fracture when the sheet is stressed. Any crack near the intended cut line needs to be noted, cutting through or near existing damage is how one clean cut turns into a broken piece.
Step 2: Mark and Secure the Material
Mark the cut line directly on the protective film with a pencil or fine marker. Use a straightedge for straight cuts and a template or compass for curves. Precise marking at this stage makes the difference between accurate and approximate cutting.
Secure the plexiglass to the work surface before cutting. To cut plexiglass without cracking, support the sheet within 50-100mm on each side of the cut line. Unsupported plexiglass can flex under cutting pressure, which may deflect the cut path or introduce stress that causes edge cracking. Use clamps with soft pads to avoid surface marks, or sandwich the sheet between two pieces of MDF if using a circular saw or jigsaw.
Step 3: Complete the Cut and Finish the Edge
Cut in a single steady pass at consistent speed. Stopping mid-cut allows heat to concentrate at one point, which melts the cut zone and leaves a rough, damaged edge. Keep the feed rate consistent throughout the cut, faster at the beginning, slowing toward the end to prevent chipping as the blade exits the material.
After cutting, finish the edge with a flat file or sandpaper to remove chips and minor irregularities. Start with 120 grit and progress to 220-400 grit for a smoother surface. For optical clarity, flame polishing can slightly melt the surface layer and produce a clearer edge appearance when performed correctly. Solvent polishing with acrylic polish achieves similar results without heat.
5 Plexiglass Cutting Tools
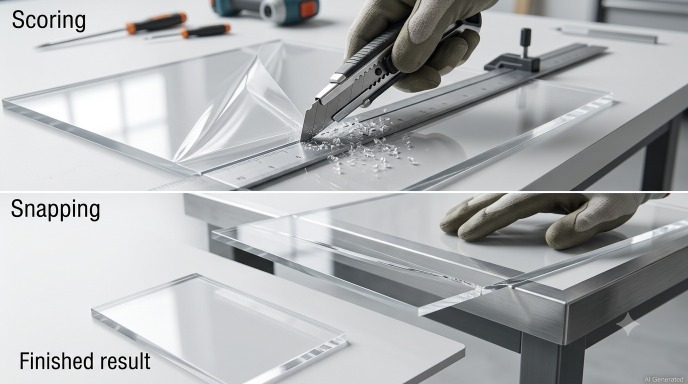
Scoring plexiglass with utility knife
1.Utility Knife
A utility knife is one of the most effective plexiglass cutting tools for thin sheets up to 6mm. The technique is score-and-snap rather than cutting all the way through. Score a deep groove along the cut line using the utility knife and a metal straightedge, typically 5-10 firm passes for 3mm plexiglass, more for thicker sheets. Position the scored line over a straight edge (the edge of a table or a piece of wood), press down firmly on the overhanging side, and the plexiglass snaps cleanly along the scored line.
The score-and-snap method produces no chips, no heat, no debris, and no noise. For straight cuts on thin plexiglass, score-and-snap is often the simplest and fastest cutting method.
2. Jigsaw
A jigsaw handles curved and irregular cuts in plexiglass from about 3mm to 15mm thickness. The correct blade for cutting plexiglass with a jigsaw is a fine-tooth blade, 1a fine-tooth blade designed for plastics, typically with a higher tooth count than standard wood-cutting blades. Standard wood-cutting jigsaw blades have too-coarse teeth and too-aggressive geometry, causing chipping and cracking.
Run the jigsaw at medium-high speed and feed at a moderate, consistent pace. Too slow increases heat from the blade rubbing; too fast causes chipping at the edge.
3. Circular Saw
A circular saw is one of the most versatile plexiglass cutting tools for straight cuts in medium-to-thick sheets. It requires a fine-tooth blade, a fine-tooth carbide-tipped blade designed for plastics or non-ferrous materials is generally recommended. Carbide-tipped fine-finish blades designed for plastics or non-ferrous metals work best.
Set the blade depth to just slightly more than the plexiglass thickness, exposing only slightly more blade than necessary reduces vibration and chipping. Feed at a steady, moderate pace. A circular saw guide rail or clamped straightedge guide improves cut line accuracy significantly.
4. Table Saw
A table saw is the most efficient plexiglass cutting tool for repeated straight cuts in production quantities. The fixed fence provides consistent cut width, and the controlled feed rate produces consistent results across many pieces. Use a fine-tooth saw blade, the same 60-80 tooth count recommendation applies, and feed steadily without stopping.
A table saw provides repeatable results for repeated straight cuts. Once the fence is set and the cutting speed is dialed in, identical pieces come off the saw consistently. For one-off cuts, the setup time may not be justified relative to a circular saw or jigsaw.
5. CO₂ Laser Cutter
CO₂ laser cutting is often preferred when clear edges and intricate shapes are required. The laser melts and vaporizes the acrylic along the cut line, leaving a flame-polished, optically clear edge directly from the machine. Laser cutting can produce a flame-polished edge appearance that often reduces the need for additional finishing.
Laser cutting can achieve high precision, with tolerances around ±0.1-0.2mm on properly calibrated equipment. For displays, signs, optical components, and precision shapes, laser cutting produces results that no mechanical cutting method can match.
Cutting Plexiglass with a Saw
Saws are the most commonly used plexiglass cutting tools for straight cuts in workshop and production environments. Getting the right results from cutting plexiglass with a saw requires matching the blade to the material and controlling the cut speed.
Choosing the Right Saw Blade
The blade is the most important variable when cutting plexiglass with a saw. The requirements:
| Blade Characteristic | Recommended for Plexiglass |
|---|---|
| Tooth count (7.25" circular) | 60-80 teeth |
| Tooth geometry | Triple chip grind (TCG) or flat top grind |
| Blade material | Carbide-tipped |
| Hook angle | 0° or slightly negative |
| Blade type label | Acrylic, plastic, or non-ferrous metal |
High-hook-angle blades designed for aggressive wood cutting grab the plexiglass and chip the edge. Zero or negative hook angle blades shear the material more cleanly. Triple chip grind geometry alternates between chamfered and flat teeth, which reduces loading and produces cleaner cuts in acrylic.
Never use a blade with missing teeth on plexiglass, even one damaged tooth produces a repeating chip pattern along the entire cut edge.
Recommended Cutting Speed
For circular saws and table saws cutting plexiglass: blade speed at the rated RPM (typically 3,000-5,000 RPM for standard saws) is correct. The variable is feed rate, the speed the material moves through the blade. Too slow creates heat; too fast creates chipping.
For 6mm plexiglass with a table saw: feed at a pace where you can maintain smooth, even movement without forcing. Listen to the saw, a saw working hard is feeding too fast. A smooth cutting sound with clean chip formation indicates correct feed rate for cutting plexiglass with a saw.
Tips for Smooth Saw Cuts
Sandwich the plexiglass between two sheets of MDF or thin plywood when cutting plexiglass with a jigsaw or circular saw, the sandwich supports the material on both sides of the cut line and prevents edge chipping that happens when the unsupported surface flexes.
Don't remove the protective film before cutting, it lubricates the blade slightly and protects the surface from scratches. Cut through the film with the plexiglass.
Tape the cut line with masking tape on the exit side of the blade (usually the underside for a table saw, upper side for a jigsaw) to further reduce chipping at the cut exit.
Cutting Plexiglass Without Cracking
Cracks during cutting plexiglass come from three sources: stress concentration at unsupported areas, heat buildup that creates thermal stress, and blade geometry that tears rather than cuts. Understanding each source points directly to the prevention.
Preventing Edge Cracks
Edge cracks during cutting plexiglass most often start at the point where the blade exits the material, the exit edge is unsupported and the blade's final contact generates a stress spike that propagates into a crack. Solutions:
Support the exit side with tape, a sandwich of waste material, or a backer board. Reduce feed rate as the blade approaches the exit of the cut. Avoid stopping mid-cut, the blade dwelling in one position concentrates heat and stress that starts cracks.
Keep blade teeth sharp. Dull teeth don't cut plexiglass cleanly, they push and compress the material as they pass, creating stress that cracks rather than cuts.
Avoiding Heat Build-Up
Heat is the second major cause of problems when cutting plexiglass. Melted edges, smoke, and cracking near the cut line all indicate too much heat. Heat comes from blade friction and chip re-welding in the cut, when chips melt and fuse back into the cut before they can clear, the cut zone fills with re-fused acrylic that the blade then has to cut through again.
Solutions: use O-flute router bits that clear chips efficiently. Run at the correct spindle speed (too slow generates more heat per tooth pass). Use air blast or coolant to reduce temperature at the cut zone. For laser cutting plexiglass, adjust power and speed settings to balance cutting speed against heat-affected zone width.
Supporting the Sheet Properly
Unsupported plexiglass flexes under cutting tool pressure. Flexing introduces stress at the cut line. Stress at the cut line causes cracks. The prevention is simple: support the sheet within 50-100mm of the cut line on both sides throughout the entire cut.
For long straight cuts, a table saw with proper table extensions supporting the material on both sides provides continuous support. For jigsaw cuts, clamp the sheet to a table with the cut line positioned over the table edge with minimum overhang. For CNC routing, use a vacuum table that holds the sheet flat across its full surface.
CNC and Laser Cutting Plexiglass
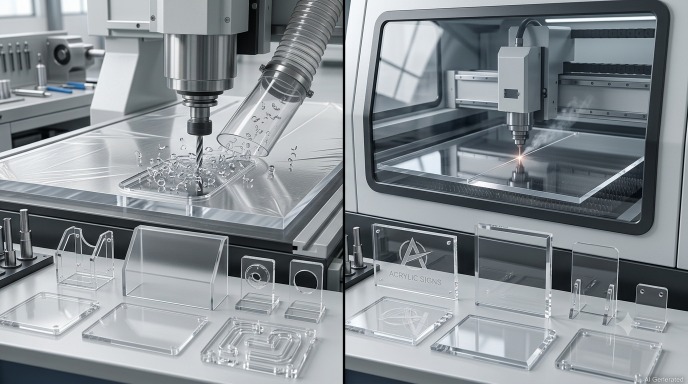
CNC vs laser cutting plexiglass
For production quantities, complex shapes, and precision requirements, CNC routing and laser cutting are the plexiglass cutting tools that consistently outperform hand and power tool methods.
CNC Routing Advantages
CNC routing cuts any shape with consistent accuracy from a digital file. Once the program is set, every piece is identical regardless of quantity. CNC plexiglass cutting tools (O-flute spiral bits) produce clean edges that require minimal post-processing and can be polished to optical clarity.
CNC routing handles plexiglass thicknesses from 3mm to 50mm and beyond. CNC routing can produce 3D features, beveled edges, engraved surfaces, and curved profiles that are difficult to achieve with basic cutting tools.
Laser Cutting Advantages
CO₂ laser cutters are commonly used when clear edges and intricate shapes are required. Intricate shapes, sharp internal corners, and fine detail that CNC routing can't achieve cleanly are accessible with laser cutting. For signage, displays, artistic work, and any application where edge clarity is a selling point, laser cutting is the best way to cut plexiglass.
Laser cutting can achieve high dimensional accuracy when properly calibrated. This makes it the least likely method to scratch or damage clear plexiglass during cutting.
Common Mistakes When Cutting Plexiglass
Using the Wrong Blade
The most common mistake when cutting plexiglass with a saw is using a wood-cutting blade with few, coarse teeth and aggressive hook angle. Wood blades tear plexiglass rather than cutting it, producing chipped edges and sometimes cracking from the impact of each widely-spaced tooth. The fix is a 60-80 tooth fine-finish blade with flat or triple-chip grind geometry, they're widely available and inexpensive.
For CNC routing, using a standard two-flute spiral bit instead of an O-flute acrylic bit causes chip re-welding that fuses cut material back into the groove and produces a rough, melted edge. O-flute bits are specifically designed for cutting plexiglass and acrylic, use them.
Feeding Too Quickly
A fast feed rate creates thick chips that don't clear well, concentrates heat at the cut zone, and puts more force on the material edges. Slow down the feed rate until the cut sounds smooth and produces clean chips rather than dust or melted debris. Consistent, moderate feed is the most reliable approach to cutting plexiglass without cracking.
Removing the Protective Film Too Early
Plexiglass comes with a protective film on both faces. Removing it before cutting exposes the surface to scratches from clamps, work surfaces, and cutting debris. Keep the film on through all cutting and machining operations. Only remove the protective film when the piece is complete and positioned for final use.
A secondary benefit of the protective film when cutting plexiglass: the film provides a clean surface for cut line marking that doesn't contaminate or scratch the acrylic surface. Mark directly on the film, cut through it with the plexiglass, then peel it off for a scratch-free surface.
Safety Tips for Cutting Plexiglass
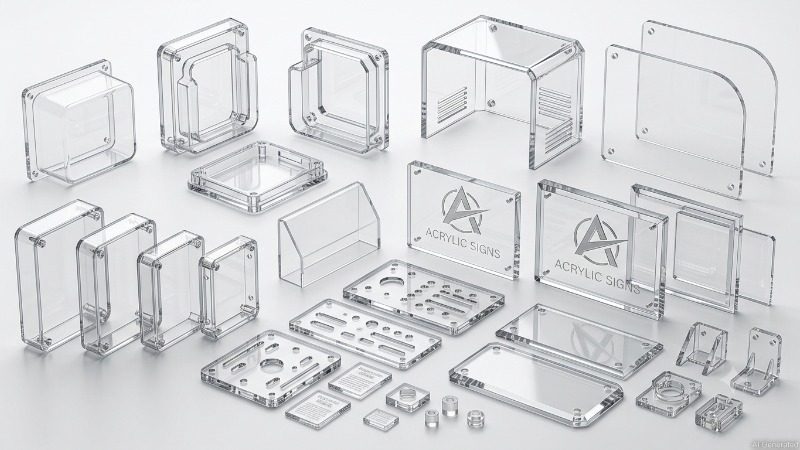
CNC machined plexiglass parts
Personal Protective Equipment
Safety glasses or goggles are non-negotiable when cutting plexiglass with any power tool. Chips from saw cuts and CNC routing are acrylic fragments that travel at high speed, eye protection prevents permanent damage from a momentary lapse.
Hearing protection for sustained table saw and circular saw use. Gloves for handling cut plexiglass edges, fresh saw cuts on plexiglass can be sharp. For laser cutting plexiglass, never look directly at the laser beam and ensure the machine's cover and interlocks are functioning before operation.
Safe Machine Operation
Secure the plexiglass before starting any power tool. A piece that shifts mid-cut either ruins the cut or becomes a projectile. Use push sticks for narrow cuts on a table saw that would bring fingers close to the blade. Never stand directly in line with the blade when cutting plexiglass on a table saw.
For CNC routing plexiglass, ensure the workholding system, vacuum table, clamps, or screws, is holding the material firmly before the spindle engages. An unsecured sheet under a CNC spindle at 20,000 RPM becomes dangerous very quickly.
Proper Workspace Setup
Extract or ventilate chips and fumes during cutting plexiglass. CNC routing produces acrylic chips and dust that should be extracted at the spindle rather than allowed to accumulate. Laser cutting plexiglass produces acrylic fumes that require ventilation, a properly connected fume extractor connected to the laser cutter is mandatory, not optional.
Keep the work area clear of flammable materials when laser cutting. The laser generates heat and can ignite flammable materials if they're within the cutting area during a focus error or material movement.
FAQs About Cutting Plexiglass
Q: What is the best way to cut plexiglass?
The best way to cut plexiglass depends on thickness and required edge quality. The best cutting method depends on thickness, shape complexity, and required edge quality. Thin sheets may be cut with score-and-snap methods, while thicker or more complex parts usually require saws, CNC routing, or laser cutting.
Q: Can you cut plexiglass with a utility knife?
Yes, for sheets up to about 6mm thick. The technique is score-and-snap rather than cutting all the way through, score a deep groove with multiple firm passes along a metal straightedge, then snap the sheet over a table edge. This produces a clean straight cut without any tool other than a utility knife and straightedge, making it one of the simplest plexiglass cutting tools for thin material.
Q:What saw works best for cutting plexiglass?
A table saw or circular saw with a 60-80 tooth fine-finish carbide-tipped blade works best for straight cuts. Triple-chip grind (TCG) tooth geometry is ideal for cutting plexiglass with a saw because it reduces chipping compared to aggressive wood-cutting tooth geometry. For curved cuts, a jigsaw with a fine-tooth plastic-cutting blade handles cutting plexiglass with a saw in non-straight profiles.
Q: What saw works best for cutting plexiglass?
Cutting plexiglass without cracking requires: supporting the sheet within 50-100mm of the cut line on both sides, using a fine-tooth blade appropriate for acrylic, maintaining consistent feed rate without stopping mid-cut, keeping the protective film on during cutting, and reducing heat buildup through correct speed settings. The most reliable approach to cutting plexiglass without cracking is proper support combined with correct blade selection.
Q: Can plexiglass (acrylic) be cut with CNC machining or laser cutting?
Yes. Plexiglass, also known as acrylic sheet, can be processed using CNC machining or CO₂ laser cutting. CNC machining is commonly used for acrylic fabrication projects requiring repeatability and complex geometries, while laser cutting is often selected for designs requiring clear edges.
Keep Learning
Laser Engraving Aluminum: Marking Methods & Surface Effects
Key Takeaways Laser engraving usually removes base material to create a recess. Laser marking is a broader term that can describe a surface-color change or material removal, so the process name alone does not define the final result. On aluminum, alloy and surface finish affect marking contrast. A light mark on dark anodized aluminum is a common design target, but the actual appearance depends on the finish and laser process. JLCCNC laser marking produces a recessed area 0.03–0.1 mm deep. The result i......
CNC Cutting Fluid: Types, Functions, Applications, and Selection Guide
Key Takeaways Cutting fluid in machining performs four functions simultaneously: cooling the tool and workpiece, lubricating the tool-chip interface to reduce friction, carrying chips away from the cut zone, and protecting machined surfaces from corrosion between operations. Different machining operations need different fluid priorities: high-speed aluminum milling may need adhesion control and chip evacuation, threading and tapping need strong lubrication, and grinding requires both cooling and fine ......
Blind Hole Machining Guide: What Is a Blind Hole, Types of Holes, and Tapping Tips
What Is a Blind Hole? Types of Holes and CNC Hole Machining Explained In CNC machining, few operations challenge process control and tool stability as much as blind hole machining. A blind hole is a hole that terminates at a defined internal depth rather than breaking through the opposite surface. Because the cavity is enclosed at the bottom, chip evacuation, thermal behavior, tool wear, and dimensional accuracy become far more difficult to manage compared to through-hole machining. These constraints ......
Rake Angle in Machining: Machinists’ Guide to Perfect Cuts
What is Rake Angle? (minaprem) If you've ever stood in front of a CNC machine or a manual lathe, you know that the cutting tool's geometry isn't just some arbitrary design. Every angle, edge, and surface has a job to do, and one of the most important of those is the rake angle. We've been running machines long enough to know that rake angle can make or break your surface finish, tool life, and machining efficiency. In this guide, we're going to walk you through what rake angle is, how it works, and ho......
Sheet Metal vs CNC Machining: A Guide to Choosing the Right Method for Your Metal Parts
Quick Answer: Choose sheet metal for uniform-thickness enclosures, panels, and formed brackets when bends and production volume support lower unit cost. Choose CNC machining for variable wall thickness, precision bores, tight feature relationships, and complex 3D geometry. Use a hybrid design when a formed structure needs precision-machined interfaces. A quote comes back for a bracket, and it's priced as a CNC part — machined from solid aluminum, a few hours of spindle time, a per-part cost that makes......
What Steps Are Taken To Minimize Waste In CNC Machining Processes?
How to Reduce Waste in CNC Machining: 5 Practical Strategies Quick Answer: CNC machining waste is reduced mainly through DFM, near-net stock, efficient toolpaths, preventive tool maintenance, and alloy-segregated recycling. The biggest gains usually come before cutting: reduce unnecessary material removal and prevent scrap or rework. Every CNC-machined part starts as more material than it ends up being. A pocket gets milled out, a profile gets cut away, a boss gets faced down to size — and all of that......